Surface Roughness Standards for Medical Needles
Medical needles have many uses. Since the needles are directly inserted into a person’s body, it is critical that manufacturers adhere to national and international standards for shape, materials, and needle strength.
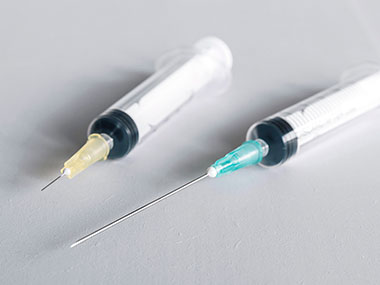
Medical needles.
The standard dimension values for shape include length, angle of the needle tip, and outer diameter. The needle’s surface condition also needs to be measured; the minimum load for withdrawing a needle is specified for each outer diameter to prevent the needle from coming out during injection.
However, the needle’s surface must also be as smooth as possible to penetrate the skin easily and minimize the patient’s pain. Many needle manufacturers set their own standards for surface roughness to meet these two requirements.
Challenges of Measuring Surface Roughness on Medical Needles
A conventional method to measure surface roughness is with a contact stylus surface roughness tester. However, measuring with this device poses two issues:
- It’s difficult to correctly position the stylus on small-diameter needles
Needles with an outer diameter less than 1 mm have an extremely small measurement area. Consequently, a contact stylus often fails to pinpoint the right measurement position.

2. The tester cannot measure fine surface roughness on small-diameter needles
The probe’s tip can contact a minimum diameter of 2 µm, but the tester cannot measure surface roughness any finer than this measurement.

Advantages of Measuring Surface Roughness on Medical Needles Using the OLS5000 Laser Scanning Confocal Microscope
- Easily set the measurement position with a precise inspection microscope
A clear, magnified image of up to 17,280X makes it easy to locate and measure the correct position on small-diameter needles.
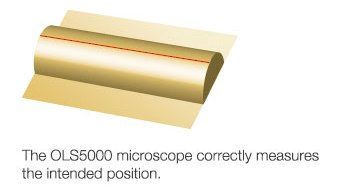
2) Measure Microscopic roughness with high precision
The OLS5000 microscope uses a 405 nm violet laser that enables a 0.4 µm measurement diameter. The small-diameter laser makes it possible to identify microscopic roughness on a needle’s surface without making contact with it.
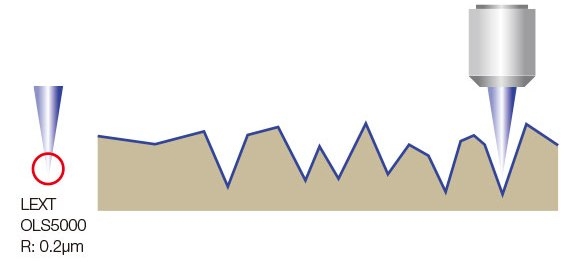
A contact roughness meter can only acquire surface roughness information on the one line traced with its measurement probe. In comparison, the OLS5000 microscope scans with a laser to gather a large amount of accurate surface data. See the differences in the following images:
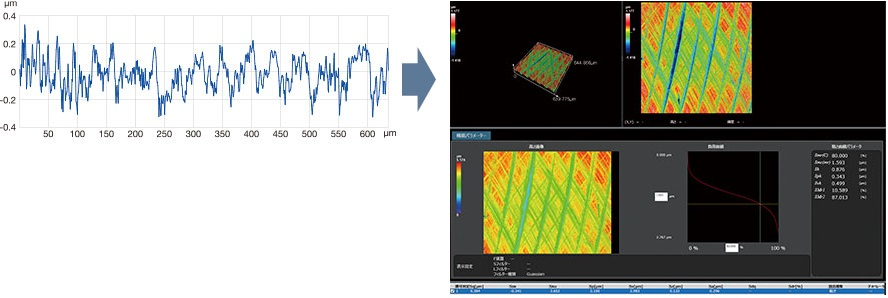
Left: Single-line data from a cross-section obtained with a contact roughness meter. Right: Surface roughness information obtained from laser scanning.
3) Gather roughness data over long distances using the stitching function.
Generally, the field of view for measuring roughness with a laser microscope ranges from tens to hundreds of microns. However, a thin, tube-shaped sample, such as a needle, usually has a measurement area of several millimeters. By utilizing the OLS5000 microscope’s data-stitching function, users can measure long distances on needles by pasting several pieces of roughness data along a plane.
Measuring the Surface Roughness of a G21 Needle Using the Evident OLS5000 Laser Scanning Microscope
Here is an example to demonstrate these advantages. The Evident OLS5000 microscope was used to measure the surface roughness of a G21 needle (outer diameter: 0.8 mm). The image below shows data from a single field of view (measurement area: 256 µm × 256 µm, magnification: 1,080X):
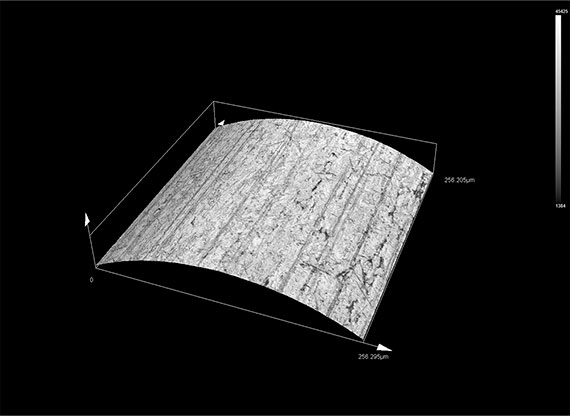
Image captured with the OLS5000 laser scanning microscope.
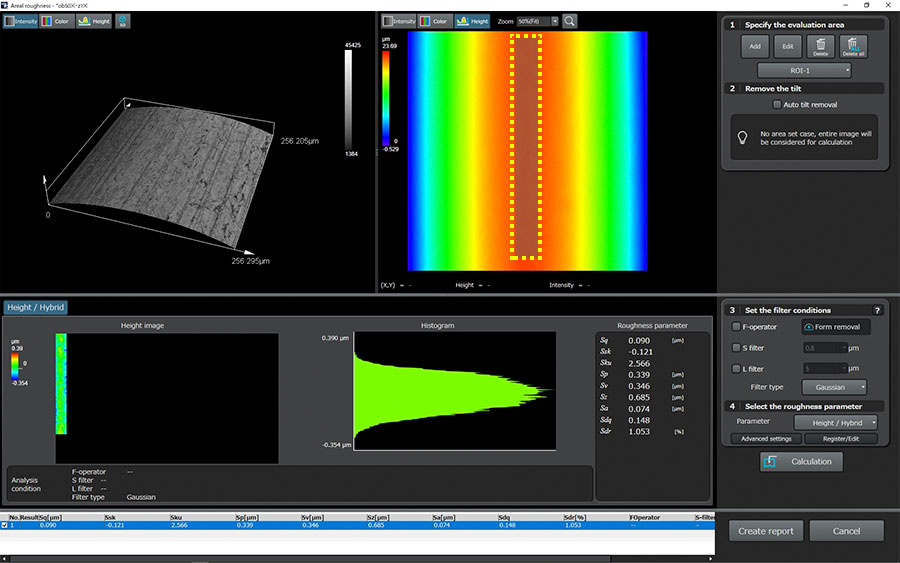
On the roughness measurement screen displayed above, the roughness of the yellow-dotted area was measured. The quality of the needle’s surface condition can be recognized using an attached image and the numerical roughness data.
The following image illustrates data from seven fields of view (measurement area: 256 µm × 1,640 µm, magnification: 1,080X):
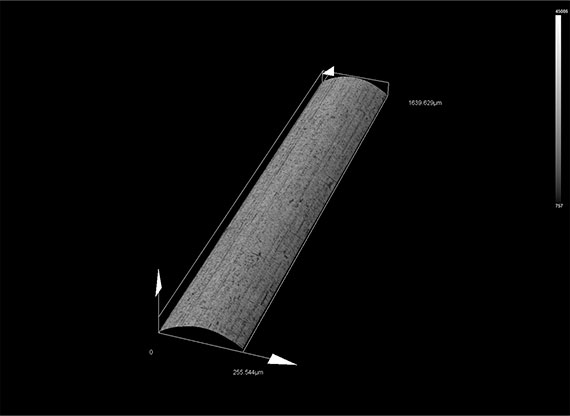
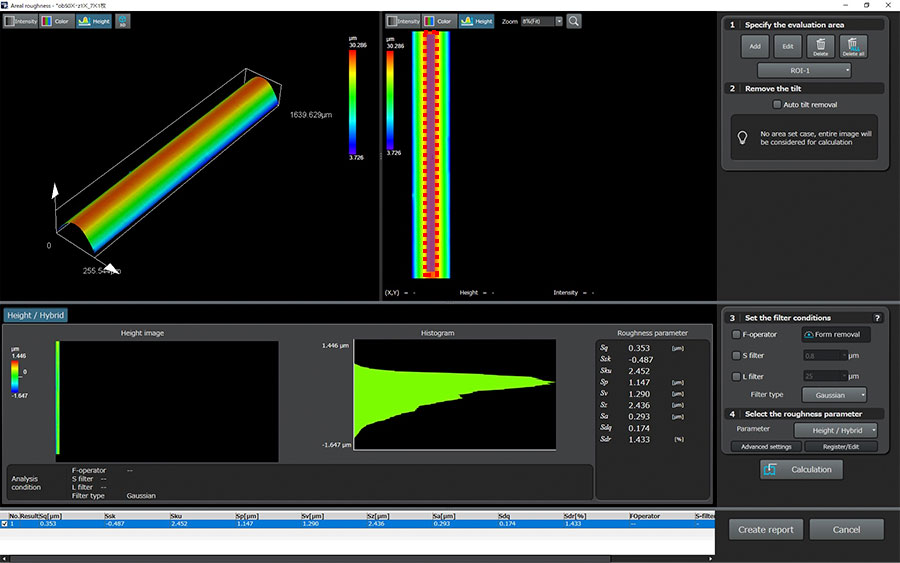
On the roughness measurement screen above, the roughness of the red-dotted area was measured. The system also offers accurate and repeatable data.

This information has been sourced, reviewed and adapted from materials provided by Evident Corporation - Industrial Microscopy.
For more information on this source, please visit Evident Corporation - Industrial Microscopy.