Manufacturers of supplier parts or complete products are increasingly encountering strict requirements across various industries, including aerospace, transportation, tooling, foundry and casting.
These requirements are geared towards improving product quality as well as lowering the total cost of quality (COQ), which is generally attributed to a multitude of factors, including:
- Changes to both quality control and quality assurance processes as prevention strategies
- External failures
- Internal failures
- Repetitive appraisals
Today, manufacturers are looking to set themselves apart from the competition in the respective markets. The limits of product design are, therefore, being pushed as the freeform design approach to improve aesthetics and raise functional performance becomes progressively more popular.
However, a series of new quality challenges are introduced in the use of freeform organic design shapes.
MetraSCAN BLACK: Best-in-class scanning speed for various part sizes
Video Credit: Creaform Inc.
Additionally, process improvements and product requirements relative to secondary manufacturing operations, such as machining, entail that dimensional tolerances are becoming tighter and tighter. Thus, data accuracy, when it comes to inspecting parts for form, fit and function, is now more vital than ever before.
On the other hand, production teams are compelled to reduce costs wherever possible in order to maintain price points, COQ and OPEX costs. Quality issues can create chaos across a manufacturer’s bottom line due to product recalls, decreased productivity, loss in material resources and more.
For instance, as stated by the American Society for Quality (ASQ), true quality-related costs can impact 40% of total operations. Therefore, companies must absorb the costs or hand the costs down to consumers and clients.
Undoubtedly, quality is a crucial differentiator for the majority of manufacturers. Previously, quality control and quality assurance operations were sidelined to labs and conducted by highly skilled operators.
However, since traditional CMMs made their way into manufacturing environments, there has been an evolution of design and production methods as well as quality criteria.
Unfortunately, the drawbacks of using CMMs now significantly outweigh their benefits. Recent metrology technologies and techniques, such as portable optical CMM 3D scanners, are becoming practicable, long-term alternatives.
These new 3D measurement solutions are revolutionizing the game by providing a fast, straightforward and dynamic means to attain extremely accurate 3D measurements directly on production floors.
Take a detailed look at how portable optical CMMs, such as the latest MetraSCAN 3D, exceed conventional CMMs.
How Versatile are 3D Scanners vs. CMMs?
As previously mentioned, manufacturers across several industries are pushing the limits of prototype concepts and final products. High-precision free-form surfaces may preset nice aesthetics and exceptional performance levels, but they also present monumental production and inspection challenges.
CMMs are not well-suited when it comes to assisting inspectors in assessing complex surfaces, such as those associated with free-form components. The reason? CMMs are appropriate for parts that ‘familiar’ shapes, like circles, squares, rectangles, etc.
Complex shapes necessitate considerably more measurement points with a CMM, which means lengthy and often awkward setups.
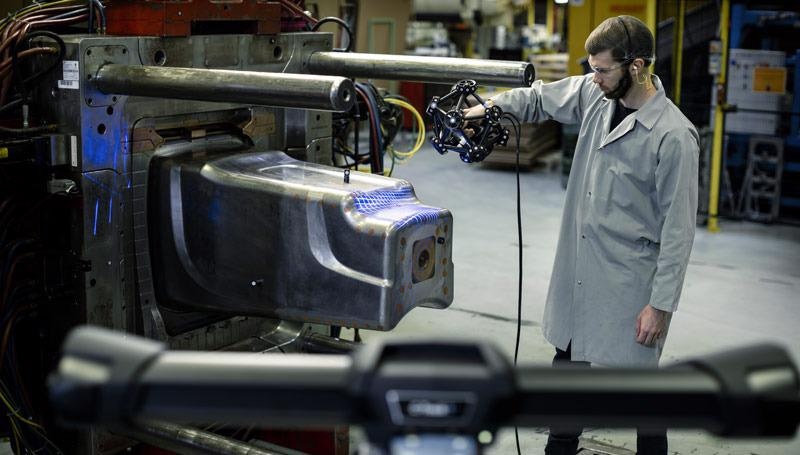
The MetraSCAN BLACK, a metrology-grade 3D scanner, enables quality control technicians to attain extremely accurate measurements, irrespective of part complexity, material or surface finish.
It incorporates blue laser technology, which, in contrast to red lasers, does not produce as much laser speckle. Blue lasers can also acquire smaller spot sizes and a better focus. Both of these benefits help achieve higher scanning resolution as well as an improved signal on shiny and metallic surfaces.
Watch how the new MetraSCAN BLACK can scan shiny and black parts effortlessly!
MetraSCAN BLACK versatility: Scan shiny, black and matte surfaces
Video Credit: Creaform Inc.
CMMs and other scanning systems also have fixed measuring volumes. In stark contrast to these kinds of measuring devices, MetraSCAN BLACK facilitates greater measurement flexibility of up to 10 meters for larger parts; the optical CMM scanner possesses the versatility to simply extend the measuring volume without any considerable loss in accuracy that usually comes with traditional leapfrog.
A final word on versatility: legacy CMMs are typically assembled in a manufacturer’s lab and fixed to the floor. The CMMs utilize probes that travel across three Cartesian axes to carry out dimensional inspections.
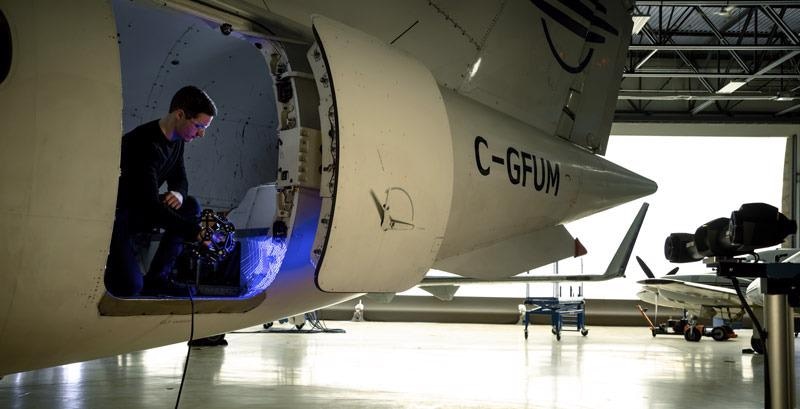
The MetraSCAN 3D solution is a mobile, arm-free 3D scanning system that utilizes optical triangulation methods and facilitates complete freedom of movement. Users can simply make 3D measurements of all kinds of objects situated anywhere — even in remote or challenging locations and even directly on shop floors.
This makes the MetraSCAN BLACK the optimal solution for not only for complex and large-sized parts but also for applications that are non-repetitive, including inspecting prototypes and reverse engineering components with serious quality issues.
Which is Faster? A CMM or a 3D Scanner?
Whether for first article inspections (FAIs) or conducting in-line/at-line quality control, speed crucial. For quality control and quality assurance, the latest 3D measurement tools are becoming manufacturers’ solutions of choice.
They help to eradicate the uncontrollable bottlenecks often affiliated with CMM dimensional inspections in the lab or dedicated cell.
Previously, very experienced metrologists were committed to one CMM. Because of this, various assembly line teams had to literally wait for their turn for quality inspections to be carried out — part by part. Workflow inefficiencies and costs were often intensified by the fact that assembly times for each part could take hours.
From an alternative viewpoint, the MetraSCAN 3D optical CMM scanner removes the need for warm-up times and enables users to conduct inspections directly on the production floor.
With its 15 laser crosses, the MetraSCAN BLACK can secure 1,800,000 measurements per second—even on substantial surface areas—and create live meshes; versus other CMMs, it can half the time needed to acquire workable files after data acquisition.

Image Credit: Creaform Inc.
Lastly, quality teams are often charged with the task of verifying supplier or customer part quality prior to the production of the final product.
Again, due to the speed of the MetraSCAN 3D when scanning parts, inspectors can quickly validate mission-critical components manufactured by third parties to limit any delays in production and speed-up throughput.
Accuracy that is Light Years Ahead
While CMMs deliver decent accuracy, operation must take place in controlled environments free from vibrations, oil, dust or changes in temperature and humidity in order to acquire optimal results.
The MetraSCAN 3D can function in any environment to offer a high level of accuracy; inspectors can utilize them directly on shop floors without impacting the measurement precision.
Furthermore, working with CMMs is generally much more complex, with stringent measurement setups and path programming. This means metrologists have the responsibility of maintaining the entire measurement workflow, from assembly to data collection to processing and analyzing results.
With accelerating production timelines and the need for speed, metrologists are often encumbered with several tasks at any given moment.
However, the MetraSCAN BLACK offers unparalleled ease of use for operators of all levels — including technicians without any metrology expertise.
Thus, entry-level workers and technicians with a small amount of training and can be appointed to assembling and conducting 3D scans of a part, while metrologists can dedicate their expertise and knowledge to making vital assessments.
The MetraSCAN BLACK offers quality control and quality assurance teams the precision required for the capture of detailed 3D scans.
In fact, with unparalleled resolutions of 0.025 mm and accuracies of 0.025 mm, the MetraSCAN 3D produces highly accurate results, regardless of what type of part. It is also unaffected by ambient conditions.
This great accuracy, predicated on the VDI/VDE 2634-part 3 standard with a solution that has been tested in an ISO 17025 accredited laboratory, enables an extremely reliable and fully traceable process aligned with international standards.

Image Credit: Creaform Inc.
Mobile and ergonomic, scanning with the MetraSCAN BLACK is straightforward as it requires no intricate setups, complex calibration or programming. Any user — from beginners to advanced inspection technicians — can generate accurate, reliable and repeatable measurements with the self-positioning (dynamic referencing) capability.
In short, the MetraSCAN 3D eliminates the guesswork from dimensional inspections—and offers an outstanding, first-class level of accuracy.
The MetraSCAN BLACK is pioneering manufacturers’ quality control and quality assurance processes. With its speed, versatility and accuracy, this optical CMM 3D scanner offers reliable, robust and efficient inspections directly in production environments.
With the MetraSCAN 3D, unforeseen non-compliance, production and part approval delays and quality costs are reduced significantly.

This information has been sourced, reviewed and adapted from materials provided by Creaform Inc.
For more information on this source, please visit Creaform Inc.