The measurement of film thickness holds significance for various manufacturing and research facilities. Fluctuations in the thickness of paint or coating can impact multiple properties crucial to the end product, including color, gloss, hardness, adhesion, and scratch resistance.
Achieving the intended properties of a coating necessitates attaining the correct film thickness. Several methods are available to measure film thickness during the application's wet and dry phases.
Wet film thickness gauges, like inter-chemical and comb-type gauges, can determine coating thickness before curing. However, in many cases, research and quality control departments seek to determine the thickness of a coating post-curing.
Destructive vs. Non-Destructive
The tools employed for gauging the thickness of a dry coating can be categorized into destructive and non-destructive. Destructive tests for film thickness entail cutting through the coating to the substrate, often employing a specialized blade, and then examining the layers under a microscope to determine the thickness.
This approach's evident drawback is the need to dismantle the product for measurement, making it less favorable. Destructive film thickness measurements typically take longer than alternative methods.
The generally preferred non-destructive approach involves using a dry film thickness or DFT gage.
Most DFT gages operate based on one of two measurement principles capable of determining the thickness of a film applied to a metal substrate.
The selection of the measurement principle depends on whether the substrate is "ferrous," containing iron and typically exhibiting magnetic properties (as seen in steel), or "non-ferrous," indicating a lack of iron and non-magnetic characteristics (as seen in aluminum).
The choice of a dry film thickness gauge generally aligns with the nature of the substrate, whether ferrous or non-ferrous. Numerous available gages incorporate both measurement principles, allowing measurement on any type of metal substrate.
Non-Metal Substrate DFT Measurement
Measuring dry film thickness on non-metal substrates, such as plastic, presents a more challenging scenario. A different type of gage becomes essential for non-destructive film thickness tests on these substrates.
The PosiTector employs a sonic principle akin to sonar for measuring dry film thickness. Sound waves are transmitted through the material, and the gauge measures the reflected sound waves. When encountering a material of different density, the reflection changes, indicating that the gage has reached the substrate or a different coating type.
Using this principle, the PosiTector can measure film thickness on a broad spectrum of non-metal substrates. Unlike typical DFT gages, it can even distinguish between different layers of coatings, concurrently measuring the thickness of up to three layers.
Application Example
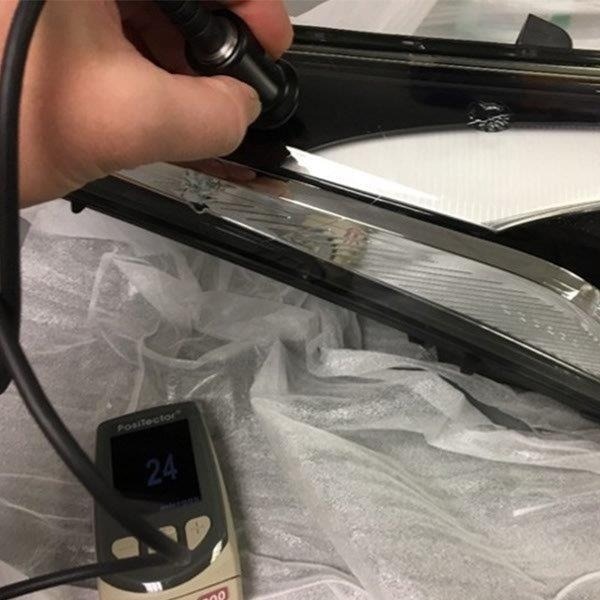
An illustrative scenario involves the application of protective clear coats on automotive headlamps. These coats applied to the headlamp's clear plastic, safeguard it from weathering and abrasion. Maintaining the clarity of the clear plastic is crucial to ensure unobstructed light beams.
Achieving this objective requires applying the clear coat at a specified thickness—sufficiently thick to preserve the protective qualities of the coating yet thin enough to keep the coating smooth and transparent.
Given that this coating is applied to clear plastic rather than metal, a conventional DFT gage is unsuitable. However, tests have demonstrated the PosiTector's effectiveness in accurately measuring the thickness of the clear coat, eliminating the need to dismantle the product for measurement.
This instrument not only saves time by providing swift measurements but also contributes to cost savings by preventing product wastage.

Image Credit: Paul N. Gardner Company, Inc.

This information has been sourced, reviewed and adapted from materials provided by Paul N. Gardner Company, Inc.
For more information on this source, please visit Paul N. Gardner Company, Inc.