What won't work: crossing your fingers, thinking happy thoughts, or wishing really, really hard.
These techniques might be appropriate for a low-stakes bingo game, but they won’t help when there’s a real problem with your product. Ignoring the root cause of a failure can have large and broad reaching repercussions. Even an isolated problem has ripple effects.
- Immediate problem for your customer.
- Scheduling delay for this and other customers.
- Supply correction.
- Production capacity adjustment.
- Recall situation.
- Back charges.
- Reputation damage.
- And the worst case scenario, litigation.
Failure analysis, conducted quickly and properly, can help keep the ripples in the lower numbers, but how do you know what to look for in a failure analysis?
Failure Investigations at Element Twin City Testing
Element failure analysts typically investigate a failure in three different ways: fractography, evaluation of the material properties, and assessment of the circumstances of failure and the operating environment. In the majority of cases, using these techniques, Element scientists can determine the root cause of failure and recommend corrections to prevent future failures.
Fractography
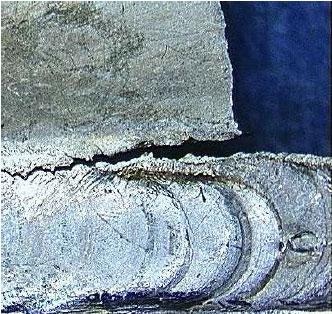
Fractography is the descriptive treatment of fracture, especially in metals, with specific reference to photographs of the fracture surface. The most common evaluations performed during a full fractographic metallurgical failure analysis include visual examination, scanning electron microscopy, energy dispersive spectroscopy, microanalysis, quantitative chemical analysis, and physical property testing, such as tensile testing and hardness determination.
Visual Examinations
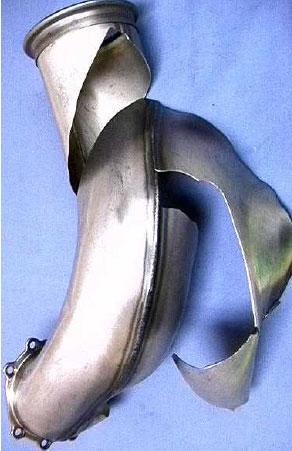
Visual examinations are performed with both the unaided eye and with magnification provided by stereomicroscopes. These initial observations yield important information regarding the mode of failure and identifying suspect origins. Features such as the location of fracture or cracking relative to geometric features on the component give important information regarding the stress state of the component at the point of cracking. The appearance of the fracture, for example dull and fibrous appearing or reflective and faceted, give indications of whether the fracture occurred in a brittle or ductile manner, as does the presence or absence of plastic deformation like necking at the fracture. Other important features that are looked for during the examination include crack arrest marks, radial marks, and chevron pattern each of which help identify crack origins, the presence of corrosion deposits or oxidation which can indicate at what point in during the component’s process or service life the crack opened, and lastly, the presence of mechanical damage or other evidence of outside influences.

Scanning Electron Microscopy
Subsequent examination using a Scanning Electron Microscope (SEM) provides high resolution imaging that often reveals fracture features characteristic of the particular failure mode present. Features such as dimples are characteristic of ductile overload, while multiple fine concentric lines or striations are typical of fatigue. During this phase of the examination the investigator confirms the failure mode and takes a closer look at the suspect initiation areas to identify possible contributing factors, such as inclusions, oxidation, corrosion products, and mechanical damage.
Semi-Quantitative Compositional Analysis
Semi-quantitative compositional analyses can also be performed at this point using Energy Dispersive X-ray Spectroscopy (EDS). EDS takes advantage of the x-rays generated by the incident electron beam and provides a spectrum of the x-ray energies present. This resulting spectrum, which resembles a histogram of sorts, reveals the relative amounts of elements present in the area being examined. Because it is attached to a microscope, this technique allows for the analysis of very small particles, i.e., a grain of sand. EDS is commonly used to analyze discolorations and stains on fractures, as well as corrosion deposits.
Microanalysis
Microanalysis involves sectioning the sample and polishing the resultant specimen to mirror-like finish. Subsequent examination of the specimen is performed in both the as-polished and etched conditions. In the as-polished condition, the Element scientist is looking for inclusions and discontinuities, such as porosity that might have contributed to cracking. Specimens are also examined for the presence of secondary cracks.
Subsequent etching reveals the microstructure of the material which can be compared to the reported thermo-mechanical processing to confirm that the material was processed properly. It also reveals conditions that could contribute to cracking, such as decarburization or alpha case.
Chemical Analysis
Chemical Analysis can confirm that a material is what it was supposed to be or identify an unknown substance; physical property testing confirms or indicates the temper condition of material.
Reports and Follow-Up Actions
At the culmination of all testing, the investigator takes the data into account with the reported circumstances of failure and documents their findings in a written and photo documented report. The more information that the investigator has available to them at this point regarding the circumstances of failure, the processing of the part, and history of the part (isolated or recurring problem, normal mode of failure) the easier it will be to pinpoint the root cause of failure. At this point, Element investigators often begin a new project with the client—developing corrective actions to limit future instances of failure.

Element Expertise
Element Materials Testing's scientific teams include experts in polymers, corrosion, and paint systems. Our engineers come from industry and academia and have wide reaching experiences with multiple material If you're outsourcing for materials, consider outsourcing for testing, to validate the quality and composition of your purchases on the global market.
Fatigue and Fracture In Environment - Short Version with Subtitles
Video Credit: Element Materials Technology

This information has been sourced, reviewed and adapted from materials provided by Element Materials Technology.
For more information on this source, please visit Element Materials Technology.