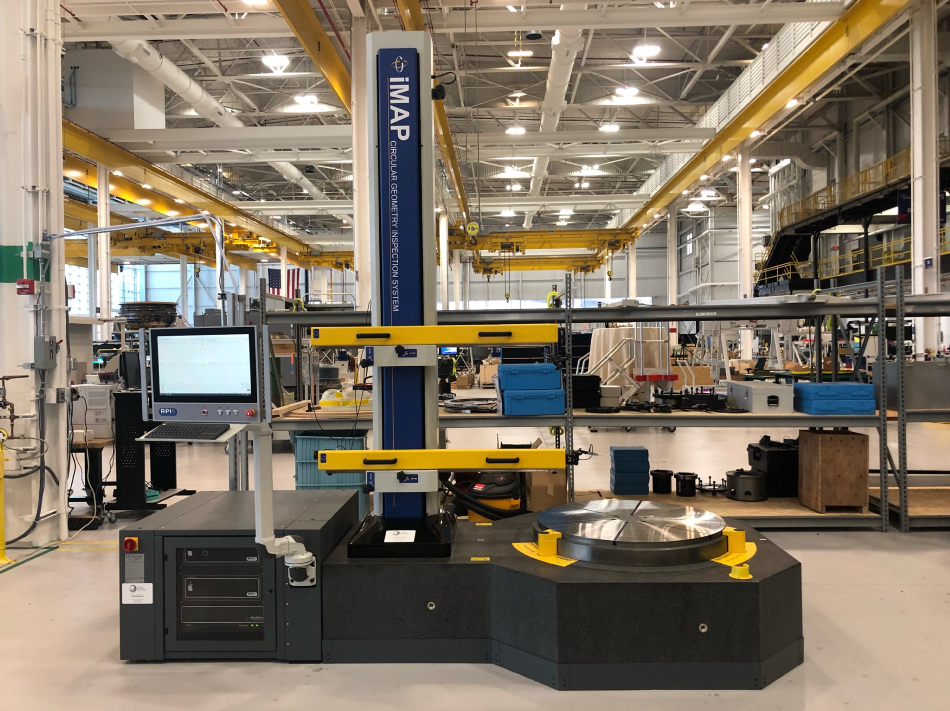
RPI, the world leader in high-accuracy rotary positioning and inspection devices, has developed a system for the measurement and assembly of gas turbine rotors that reduces the rate of teardowns by 95%.

The assembly of a gas turbine rotor is an extremely complicated and time-consuming process. It can take a week or more to assemble the rotor, and the geometric tolerances of the assembly must be very closely controlled to ensure efficient performance and safe operation.
If the rotor doesn’t meet final assembly criteria, it’s subject to a ‘teardown’, where it must be completely disassembled and reassembled. This additional work interrupts the entire manufacturing process and can cost tens or even hundreds of thousands of dollars in damaged parts, labour and delivery penalties.
These costly teardowns can be avoided if individual rotor component geometries are fully characterised and if the rotor assembly is simulated prior to its actual assembly. This virtual assembly process is commonly known as “rotor stacking.”
RPI’s Integrated Measurement and Assembly Platform (iMAP) is a complete rotor stacking solution featuring a high-precision, motorised air-bearing rotary table, an AccuScanTM circular geometry inspection system and IntelliStackTM rotor stacking software.
iMAP systems can handle components as large as 35 tonnes and over 20 m3 with sub-micron mechanical accuracies , and a measuring resolution of less than 250 nm. Traditional dial indicator measurement methods are still employed by some global OEMs, where data is manually collected and recorded from perhaps 8 to 12 data points per part surface, one surface at a time.
It sometimes takes a full shift just to measure a single part. With an iMAP system, this time-consuming and error-prone process is replaced by the automated collection of up to 4,000 data points per surface from as many as 8 surfaces in one 30-second rotation of the part, resulting in tremendous annual labour savings.
iMAP systems deliver new levels of accuracy, flexibility and quality to the assembly process and have been installed in power generation, industrial turbine and aircraft engine manufacturing plants worldwide. They offer measurements an order of magnitude better than even the most precise traditional inspection methods, and they have proven to significantly reduce the rate of teardowns.
Jim Palmer, Sales Manager at RPI, said: “Teardowns are costly not only in the typical sense, but also in terms of time and labour. The margins for assembly of gas turbine and aircraft engines rotors are microscopic, smaller than an eighth of a strand of human hair. With AccuScan, our customers can reliably measure the tolerances to prevent teardowns or operational problems later on.”
“The systems allow customers to have confidence in their turbine rotor assembly process. The significantly more reliable measurement data collected by iMAP enables the rotor stacking software to accurately model component parts, resulting in the design of precisely aligned rotor assemblies before you’ve got anywhere near the assembly line. iMAP has been independently verified and proven to offer our customers significant operational improvements over their traditional assembly methods.”
According to Greg Valente, software architect for the system, “Without iMAP, rotor assembly is a shot in the dark, where you’re using look, feel and bit of good luck to try to meet extremely tight assembly tolerances.
“iMap allows you to quantify the inspection and assembly processes, giving you predictability, and it allows you to spot anomalies and see details of part quality that would otherwise go unnoticed. Opportunities for defects are significantly reduced by eliminating manual calculations and human recording errors.
“iMap systems enable a level of accuracy not achievable any other way. It’s a fail-safe way to assemble an efficient turbine, maximising energy output and reducing maintenance.”
iMAP solutions can be supplied in a variety of configurations with probes to suit each specific application.
Jim Palmer continued: “The dial indicator measurement system often results in more guess work and many more teardowns, with around a 50% failure rate. RPI’s technology has reduced this to less than a 5% failure rate.”