Optical Metrology providers are responding to customer demands for greater data density and ever more complex applications, often in difficult environments. AZoM spoke with Dr. Peter de Groot, of ZYGO, about his thoughts and expertise surrounding the subject and how he feels ZYGO will lead the industry moving forward.
Can you briefly describe ZYGO, the kinds of products that you sell, and the markets that you serve?
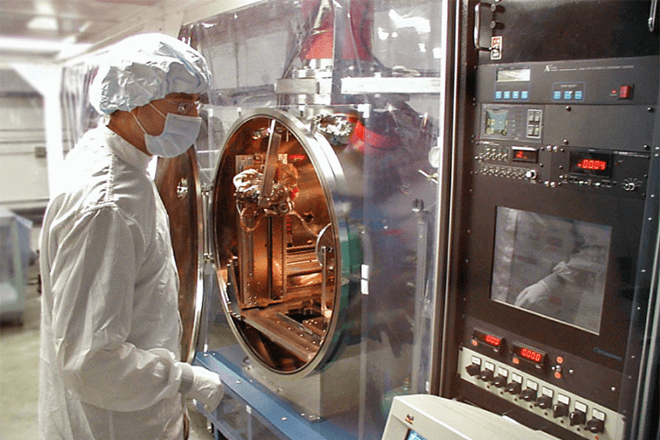
Sure! ZYGO was founded 50 years ago by Connecticut entrepreneurs as a provider of custom optics and precision engineering systems for optics fabrication. Metrology instruments for positioning and surface analysis became part of the business early in the development of the company, as a natural extension of the optics fabrication activity. Today about two thirds of what we sell falls into the metrology bucket, and the other third continues the tradition of state-of-the-art optics. Most of our metrology systems address high-precision needs in semiconductor lithography, consumer electronics, optical testing, precision manufacturing—generally, anywhere where high-performance dimensional metrology is key to process development and manufacturing yield.

Image Credits: ZYGO
What is your role at ZYGO?
I have been at ZYGO for 25 years, and was lucky enough to work for Carl Zanoni, one of the company founders, up until his retirement in 2009. Carl was passionate about innovation and always promoted new ideas as fundamental to ZYGO’s business model. Today I manage the innovations process for ZYGO, which is a real joy. There are few places in the world where you can invent a new technology and watch it develop into a new product that solves customer problems. Most of what I do relates to the metrology side of the business, which includes laser displacement interferometers for stage metrology, interference microscopes, heterodyne optical encoders, laser Fizeau interferometers and other instruments. It’s all good physics and challenging engineering.
What do you see as the major trends in optical metrology?
A major pull from the metrology market is for greater data density for ever more complex applications, often in difficult environments. A couple of examples illustrate the point. The smart phones that we carry with us everywhere have amazing camera lenses, made up of multiple aspheric elements. The manufacturing yield for the lens assembly depends not only on the shape of these complicated aspheres, but on the various built-in features that allow the individual lenses to fall into alignment when assembled in the lens barrel. Manufacturers want as much information as they can get about the surfaces and the interlocking alignment features, as quickly as possible, with high confidence. We have been addressing this need with the COMPASS™ system, which combines interference microscopy, multi-axis staging and entirely new software for evaluating lens molds as well as individual production lenses.

Image Credits: ZYGO
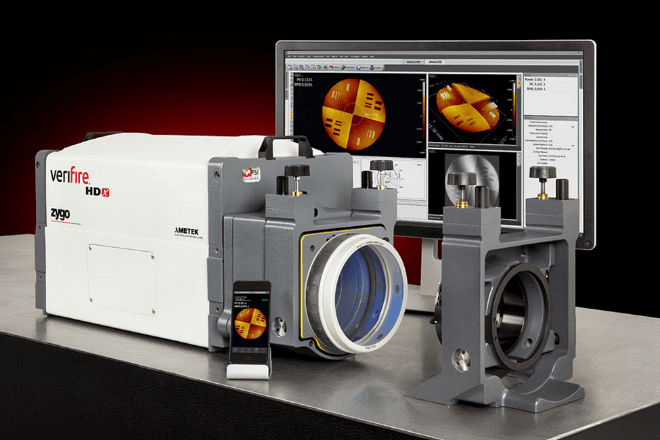
Another example is the testing of large flat optics, where there is an increasing emphasis on detailed full-field 3D imaging covering form, waviness and even surface roughness in one go. We recently introduced the VeriFire™ HDX with an 11-megapixel camera and matching optics. This system may hold the world’s record for data rate in a laser Fizeau interferometer—250 million independent surface topography points per second, with a noise level of less than a nanometer. This kind of performance would have been difficult to imagine when I began my career the 1980’s.
You mentioned difficult environments. Do you mean vibration? Air turbulence?
Yes, both vibration and turbulence. It’s often said that the biggest advantage of interferometry is high sensitivity, while its biggest disadvantage is… high sensitivity! So we have to find ways to preserve measurement precision and flexibility while enabling applications in areas that have significant vibration and air turbulence. Examples include our SureScan™ technology on the microscopes, and the DynaPhase™ dynamic data acquisition on the laser interferometers. These technologies help to bring the instruments closer to the production floor. In other cases where the environment is not as challenging, these technologies improve confidence, accuracy and ease of instrument setup.
Reliable Interferometric Metrology in Adverse Conditions
Where do you get your ideas? Where do the innovations come from?
We start by listening to our customers, always looking for that critical unmet need that represents an opportunity. Then the brainstorming begins. We generate a lot of solutions in house, relying on a dedicated group of innovation scientists as well as the product engineering and marketing groups inside of ZYGO. One measure of innovation productivity is the nearly one thousand US and foreign patents that the company has been awarded, with over 80% of these granted within the last 20 years. But we are also active members of the larger optical engineering community, drawing from and contributing to the technical literature. We sometimes feel a bit isolated here in the New England countryside, so we leverage our customer and professional relationships worldwide to augment our idea generation.
Does ZYGO ever work directly with Academia?
Yes! A great example is our on-going collaboration with the Manufacturing Metrology Team at the University of Nottingham. They have a NewView™ system installed there, and are engaged in both theoretical and applications-oriented research on areal surface topography measurement using this system. A focus of activity has been the metrology of additive manufacturing surfaces, which are difficult to measure because of high slopes and complex features that previously were considered beyond the reach of interferometric methods. ZYGO’s MoreData™ capability has been a breakthrough for this application, making interferometry arguably the gold standard for additive manufacturing surface topography analysis.
Is optics manufacturing still important to ZYGO?
Absolutely. Many people more familiar with our metrology products are surprised to learn of ZYGO’s strong optics business. We fabricate many of the optical components for our instruments, such as the UltraFlat™ and UltraSphere™ reference optics for our Fizeau interferometers. ZYGO has also been a participant in several high-profile “big science” projects. We delivered some of the most precise optics ever manufactured to the LIGO and Virgo gravitational observatories, which were recently recognized by the 2017 Nobel Prize in Physics. We also built the latest 5th-generation, 0.5-NA Microfield Exposure Tool for Extreme Ultraviolet Lithography. ZYGO has been a prime contractor for Laser Fusion Amplifiers and the National Ignition Facility for many years. On a different scale, ZYGO designs and assembles optical assemblies for a wide range of markets, including medical and life sciences.
World's most powerful laser required custom plano optics: making laser amplifiers for NIF
Final thoughts?
Everything under the broad umbrella of optics, from optical engineering to advanced photonic devices, is booming these days. It’s a great time to be working in this area. ZYGO has a lot of new products and we are investing in the next generation of innovation and technical advances, both for metrology and optics fabrication. It’s worth a look at the ZYGO web page and our research papers to gage the latest developments.
Zygo Corporation, World's Greatest
About Dr. de Groot
Dr. de Groot is an inventor, scientist and R&D manager, specializing in optical metrology. His research has led to 135 US patents and 150 technical publications. He is a Fellow of the SPIE, a Fellow of the Optical Society of America, an Honorary Professor at the University of Nottingham, and an active and enthusiastic member of the applied optics community.

Disclaimer: The views expressed here are those of the interviewee and do not necessarily represent the views of AZoM.com Limited (T/A) AZoNetwork, the owner and operator of this website. This disclaimer forms part of the Terms and Conditions of use of this website.