There are several misconceptions about using optical technologies to measure different surfaces in different kinds of environments. AZoM talks with Michael Schmidt about how ZYGO is developing technologies that overcome the misconceptions.
Could You Please Give a Brief Overview of ZYGO, and What Sets You Apart from Other Members of Your Industry?
Zygo Corporation was established approximately 50 years ago, initially conceived as a premier fabricator of high precision plane-parallel optics. These types of optics were used both for satellite applications as well as in commercial applications. To produce these precise high-end optical components, our engineers needed a way to qualify the components. From in-house development, the first commercially available, high-precision, non-contact Fizeau interferometer was created. From this creation, both a market was realized as well as the ZYGO Instruments Division, for which I work.
The products that I currently focus on are the microscope-based systems - what we call the non-contact optical profilers. The market that I currently address is the precision machining and automotive market.
A few things which separate ZYGO from our competition is our ability to work closely with our customers and ascertain their needs. Focusing on our customers helps plot the development path we take with instrument innovation. From research and engineering to marketing and sales, the customers and their needs are always the focus. Continuous innovation generates superior technology and performance, addressing our customers confidence in metrology and, in turn, their products.
One of the most significant positive impressions of the ZYGO brand which our customers recognize is the level of pre/post-sales support. With our world-class Advanced Applications Group and Field Service Team, our customers are assured quality and expedited assistance.
How Does Your Background Fit into the ZYGO Team?
My interest in precision machining stems from my father. A German immigrant trained in machine tool making, he eventually founded his tool and die company in the United States. I would watch him tinker and machine his creations in the garage, always amazed by what could be created.
After starting with ZYGO, I moved to our German office to assist with applications development for some of the most recognized brands in German manufacturing. Much of this development occurred because diesel injector sealing surfaces could no longer be measured with stylus-based equipment. With extremely tight specifications on surface roughness and form, any contact instrument could mar the surface, thereby creating a leak path when the injector is under pressure. Therefore, non-contact metrology was required, and ZYGO optical profilers were readily adopted for their high repeatability and robustness for the factory floor.
What Trends are You Seeing in the Precision Manufacturing and Machining Industry?
One trend which we are following closely is additive manufacturing. The ability for manufacturers to print components has exceptionally high potential to change the manufacturing landscape in the future. Currently, there is much research to increase the print resolution and reduce the amount of post-processing required for a final product. Working with several universities, ZYGO equipment is assisting researchers to answer questions on surface texture, structure, and quantifying additive manufacturing processes.
One of my key responsibilities is being involved with our automotive OEM manufacturers and their suppliers. With current regulations on emissions reduction as well as improved vehicle efficiency, demands on the capabilities of manufacturing equipment have expanded. With vehicle weight reduction, the ‘turbo-fication’ of engines, and other creative solutions, automotive manufacturers are looking to new machining technologies to produce tighter tolerances, stronger components, and smoother surfaces. This combination of needs fits the non-contact optical metrology suite of capabilities perfectly for immediate feedback to the process engineer.
Could You Give an Example of this? For Example, a Specific Product that You Offer?
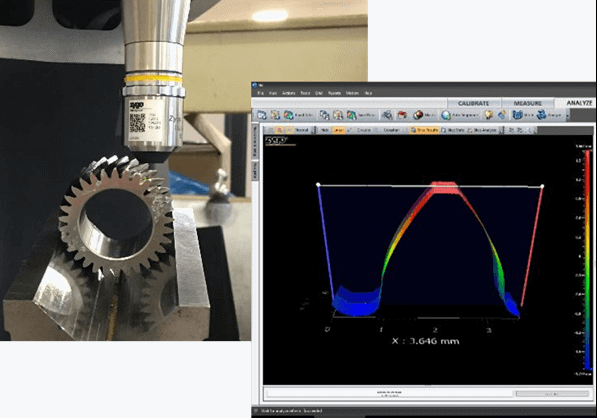
If we consider the gears contained in automotive transmissions, the surface texture should be such that it is not excessively noisy, but is extremely efficient, and should hold up to the daily stresses for the lifetime of the vehicle, if possible.
By using our ZeGage™, benchtop non-contact optical profiler, manufacturers can gauge their grinding or polishing process almost instantly by measuring the gear flank surface for parameters which relate directly to the tribology of the system.

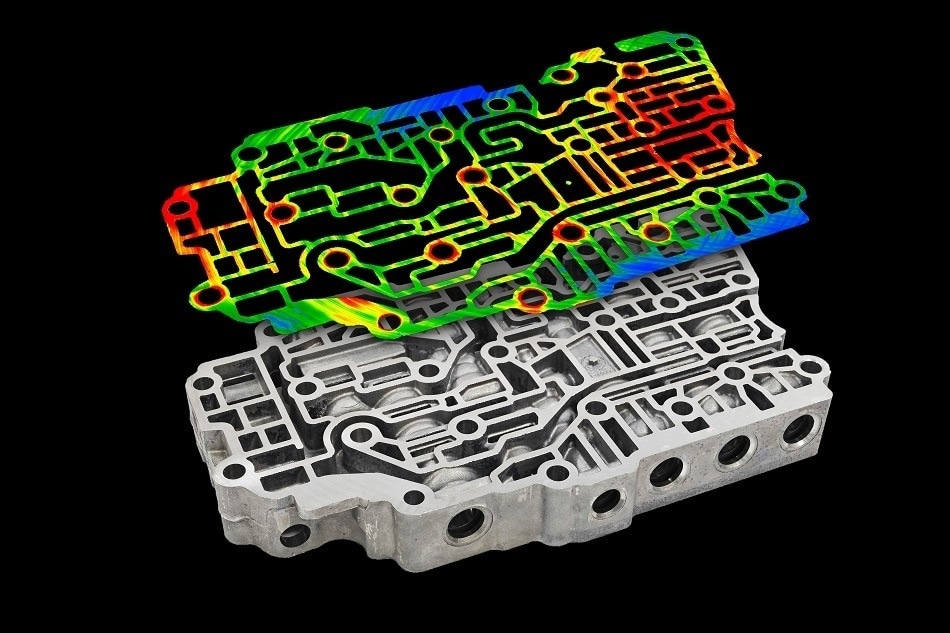
Automotive transmission body surface flatness

Transmission gear form
Moving on from gears, the light-weighting of engines is another approach for increasing efficiency. This introduces the spraying of cylinder bores with extremely robust thermal coatings on aluminum blocks, rather than using heavy iron engines. These spray-on surfaces can be very rough and need to be inspected for pores and defects which can affect the grinding that takes place later in the process. With our instruments’ wide dynamic range, we can easily measure surfaces which are very rough,highly sloped, or mirror-like polished. The instruments are great for measuring not only surface texture, but also for other required inspection items, such as porosity, part form, and some GD&T.
What are some of the Biggest Misconceptions About Using Optical Technologies to Measure Different Surfaces in Different Kinds of Environments?
There are a few different types of misconceptions. The first one is probably that the system doesn't work well on the production floor. The reality is that we have many systems that are used on the production floor every day. Moreover, we've developed technology to mitigate some of the more common sources of vibration found in these environments. One such innovation is our SureScan™ technology, which allows our customers to have confidence their measurements will be repeatable, no matter where in the factory our instrument resides.
We have many instances where our systems are out on the production floor right next to cutting or grinding machines. This helps reduce the amount of time needed for a process engineer to set up the tool, rather than bringing a set of parts to a metrology room, measuring the parts, bringing it back, resetting the machine. The reduction in inspection time helps decrease the number of defects that come off that system.
The second misconception is usability or ease of use. One of the most common bits of feedback that we get from our customers is that the tool and the software are so much easier to use than other technologies. With ZYGO Mx™ software, the user can quickly focus on the part surface and attain a measurement with a single button press – regardless of whether the part is smooth and uniform or extremely rough.
ZYGO's ZeGage™ Optical Profiler Measures Precision Surfaces of Implantable Medical Devices
What Makes Your Products and Technology Different from Anything else on the Market?
Our technology is based on Coherent Scanning Interferometry (CSI), and while several competitors also offer instruments with CSI capabilities, ZYGO’s Coherent Scanning Interferometry is unique. Contained within many ZYGO patents is a dedication to the improvement of CSI technology. Our SureScan™ technology mitigates the effects of mechanical vibration, which could produce poor measurement repeatability. There is also an option for oversampling, allowing our CSI-based instruments to measure surfaces that have low reflectivity, are highly sloped, or are extremely rough.
In addition, ZYGO offers the widest selection of interferometric objectives on the market, with magnifications ranging from 1X to 100X. Many of our objectives are truly unique to ZYGO, including several specialty objectives, such as those with very long working distances, to enable key applications. ZYGO can do this due in part to our heritage as an optics company, with deep optical expertise, and the ability to manufacture these precise optical assemblies. .
Compared with other types of technologies, such as confocal or focus variation, which measure very highly sloped surfaces or extremely rough surfaces, there has been a common misconception that CSI does not have the same capabilities. As pointed out, this is false. This is one of the reasons customers choose the innovative, high-quality, technology that ZYGO provides.

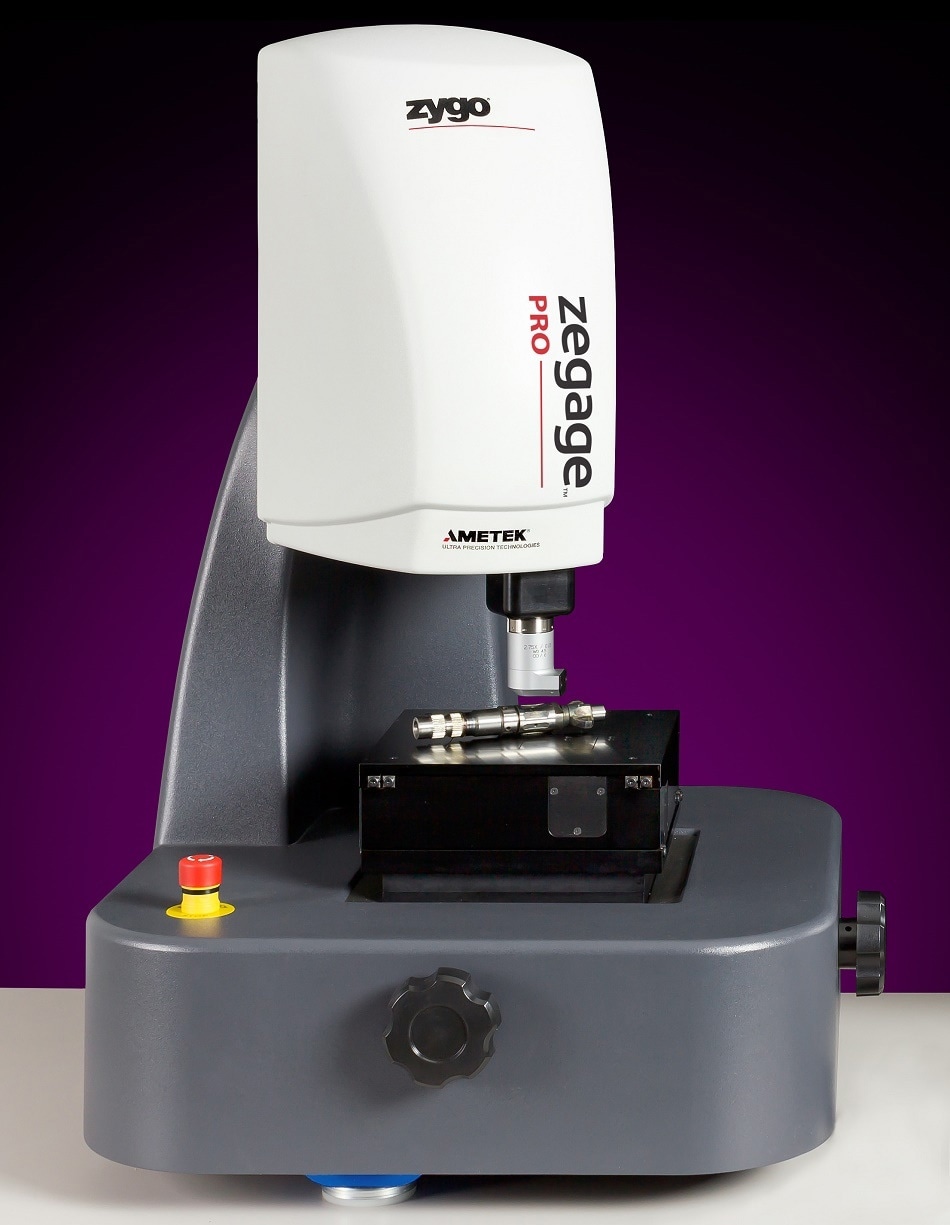
The ZeGage™ Pro non-contact optical profiler
What is Next for You and ZYGO?
We are continually evolving regarding software and hardware, based on our interactions with customers. A lot of this comes back to just basic marketing principles such as listening carefully to the customers and addressing their needs.
We are continually refining the user's experience with the software and hardware. One example is the recent introduction of the “Smart Setup” feature. This software feature helps the user to find, focus, and acquire data with just a button press. It sounds elementary, but with the range of surfaces to be measured, and the combinations of objectives ZYGO offers, we let the software do the work for the customer, so they can spend more time analyzing the results and less time setting up to measure.
With all the options customers have for price, performance, and reliability, we at ZYGO strive to make them feel comfortable and confident that ZYGO was the right choice.
About Michael Schmidt
Mike Schmidt, Market Development Manager for the Zygo Corporation, has served the precision machining and industrial markets for nearly two decades and has extensive knowledge of non-contact optical metrology technology and the development of application solutions. Mike has assisted numerous market-leading and global precision manufacturing companies in the transition and deployment of optical technology and process control solutions to the factory floor. Mike has authored and co-authored several industry articles and conference papers and remains active in support of 3D standards and the advancement and adoption of non-contact optical metrology methods.

Disclaimer: The views expressed here are those of the interviewee and do not necessarily represent the views of AZoM.com Limited (T/A) AZoNetwork, the owner and operator of this website. This disclaimer forms part of the Terms and Conditions of use of this website.