Cambridge Technology, based in Taunton in the United Kingdom, is a manufacturer of precision Beryllium mirrors. The company recently outlined how employing best-in-class interferometry hardware and software solutions has led to highly streamlined manufacturing processes improved time savings, and enhanced cost-effectiveness throughout the organization.

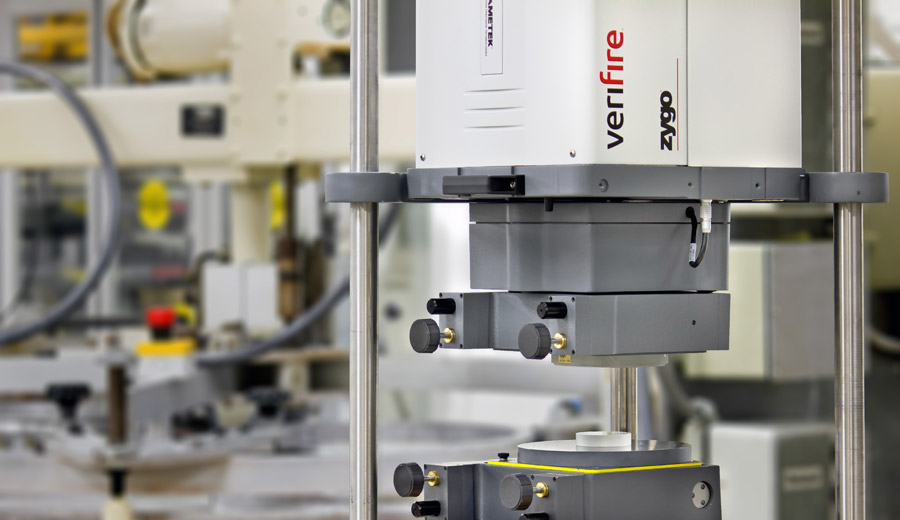
ZYGO's Verifire interferometer in vertical downward-looking orientation qualifying a mirror using patented QPSI vibration tolerant data acquisition. Image Credit: Zygo Corporation
Recent technological advances have promoted metrology from a ‘necessary evil’ in manufacturing scenarios to a more central enabling technology, highly beneficial in the measurement of historically unfeasible part characteristics. Metrology is now driving innovation across a wide range of industry sectors.
It could be argued that the advent of best-in-class metrology solutions has catalyzed the drive towards this change via advances in precision, miniaturization, throughput, and quality control. As the old adage goes, "If you can't measure it, you can't make it," and being able to repeatedly measure to the required accuracy means that there is no real limit in terms of producing cutting-edge components and parts.
Cambridge Technology boasts a manufacturing pedigree of over half a century, specializing in the production of ultra-lightweight coated beryllium mirrors for its parent facility located in Bedford, MA, USA. These mirrors are designed to be integrated into laser beam steering assemblies, which are in turn employed in numerous applications, from laser eye surgery to PCB drilling.
Cambridge Technology wanted to advance its design and manufacturing capabilities, with a particular focus on leveraging and integrating process metrology to effectively optimize manufacturing yields through stringent quality control.
Cambridge Technology’s mirrors must be precisely manufactured, leading the company to partner with innovative technology suppliers over time, with a view to ensuring that manufacturing processes are fully optimized. ZYGO was selected to help Cambridge Technology advance its metrology capabilities, which it did by supplying new state-of-the-art laser interferometer systems that operate via ZYGO's Mx™ metrology software.
This article explores laser interferometry’s role when integrated into an optimized and automated manufacturing process. Key issues in supplier selection are highlighted, along with first-hand testimony from Cambridge Technology on how the company has utilized ZYGO's advanced optical metrology solutions in its work to advance manufacturing process development and product design innovation.
Assessing the Advanced Metrology Landscape
ZYGO’s non-destructive, non-contact 3D optical profilers and laser interferometers have allowed the company to elevate the status of metrology to a disruptive, enabling technology.
Optical metrology is exceptionally versatile, playing a vital role in the verification of quality and design intent. In many instances, optical metrology is now the preferred solution, chosen because it is non-contact (ideal for measuring delicate or deformable components), non-destructive, rapid, extremely sensitive, and has the capacity to exhibit exceptional accuracy and resolution characteristics.
Applications of ZYGO’s optical metrology instruments extend far beyond quality control, however, with the technology’s benefits being employed in advanced process development, process control, R&D, and more general manufacturing optimization.
Cambridge Technology has recognized that interferometry is the best option for advanced characterization of its essential parts, understanding that no other metrology solution innovators can match ZYGO’s level of expertise and experience.
Cambridge Technology and ZYGO's Laser Interferometry
Cambridge Technology utilizes laser interferometry to measure the surface forms of virtually every precision beryllium mirror manufactured. Measurement is performed at different stages in the product lifecycle in order to gain a clear, comprehensive understanding of performance characteristics.
The original laser interferometry solution used by the company underperformed in two key areas. First, the solution was susceptible to environmental vibrations, and second, measurement data was stored as individual text files, making it extremely difficult to collate and analyze.
Each type of mirror in the Cambridge Technology range expected the use of a different application, meaning that the laser interferometer had to be configured for each one individually. Metrology was operator-intensive, and technicians were required to manually load different masks for each type of mirror type and for each individual measurement performed - sometimes as many as three times per mirror.
The company required a new metrology solution to overcome these issues – a solution that would encourage process automation, alleviate manual workload pressure and mitigate sensitivity to environmental vibration, thus avoiding the need to remeasure.
The company opted to replace existing laser interferometers with current generation instruments that operated on ZYGO's Mx™ software. This simple choice resulted in immediate improvements in processing times as well as a reduction in operator errors.
Greg Salter, Quality Engineer at Cambridge Technology, summarizes these changes, "The reduction in processing times comes as a result of our ability to customize Mx™ using scripting. The reduced processing times for parts with multiple masks (apertures) has been a massive improvement, along with the removal of the necessity of operators from having to load each mask manually or having to select different parts of a mask to re-analyze different apertures of a mirror."
Using ZYGO's Mx™ software in conjunction with a series of Python scripts, Cambridge Technology is able to maintain a database of all its parts, also including corresponding tolerances, masks and settings. These are selectable by the operator, and it is now possible for the production engineer to adjust tolerances remotely in a centrally located database, with no disruption in the production workflow.

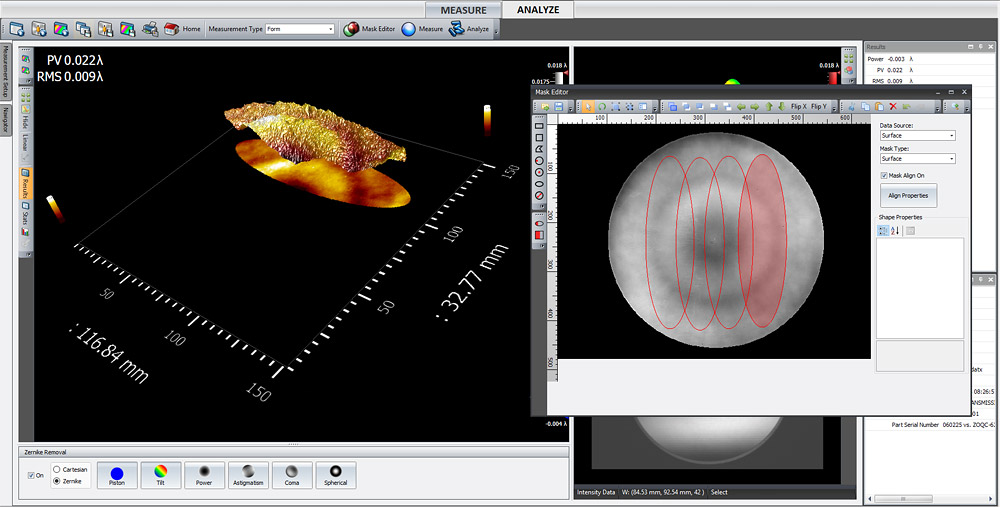
Mx instrument controller software enables automated acquisition and analysis with user-friendly built-in tools and extended flexibility and customization through integrated Python scripting. Image Credit: Zygo Corporation
MX loads the correct masks and tolerances for each part automatically by selecting the part number from a drop-down menu. The ZYGO laser interferometer software can now automatically load and swap different masks during measurement without operator input, which means measurement is quicker, throughput of mirrors is increased, and operator errors have been reduced.
Greg Salter, Quality Engineer, Cambridge Technology
Salter continued, “The flatness data automatically outputs to a database for easy analysis and monitoring of each stage of manufacturing (SPC etc...). This has already enabled us to use control limits at various manufacturing stages to ensure that the mirrors will be compliant at the end of the manufacturing process. As we continually improve our methods of manufacture, the analysis that this system provides will enable us to gradually reduce how many mirrors we inspect per batch of mirrors, whilst still providing flatness compliance."
"If a mirror is not suitable for the application for which it was intended, Mx™ can check similar mirror types and advise if we can use that mirror for an alternative application, thus reducing scrap. Our parent company in Bedford, MA, USA, also uses our database to control their ZYGO interferometers, it gets instantly updated at both sites simultaneously, which has once and for all ironed out discrepancies between our methods of measurement. Our parent company also stores measurement data so we can monitor mirror performance as it progresses through manufacturing. All of this is achieved using the ability of Mx to allow us to customize how it works by using Python scripts to adapt to our required methods."
In order to properly support a 24/7 manufacturing operation, Cambridge Technology’s choice of software solution had to be deployed over numerous instruments across manufacturing facilities in various locations. It was essential that downtime be minimized and that operator training was kept as straightforward as possible. This was all made possible thanks to the partnership between Cambridge Technology and ZYGO.
We found MX™ to be a simple, efficient, and supportable solution that minimized impact on resources and capacity within the manufacturing environment. The intuitive design of Mx and its overall simplicity were hugely important, as was the help and assistance from Lambda Photometrics and ZYGO with our particular issues and requirements when it came to problems we were unsure how to overcome, especially with python scripts.
Greg Salter, Quality Engineer, Cambridge Technology
“Lambda and ZYGO provided an understanding of how to achieve certain goals using python (including sending us code examples), and providing us with a way of using a catalogue of existing Mx masks on the new interferometer," added Salter.
Creating a "Set-and-Forget" Application Software Environment
ZYGO's Mx™ software includes an advanced scripting function, and this has allowed Cambridge Technology to develop a custom, recipe-driven "set-and-forget" application.
This was achieved by utilising a database which we designed and built to work within Mx™, containing all of the parameters required to enable the measurement of any mirror. These include mask names, number of masks and flatness tolerances. All the operator has to do is select a part number from a list (or scan a barcode on our manufacturing datapack) and Mx applies the predetermined settings for that particular mirror prescription, records its serial number, acquires and analyses the data and informs the operator if it is a pass or a fail in simple terms.
Greg Salter, Quality Engineer, Cambridge Technology
"With ZYGO's Mx-based metrology instruments, our configuration control is much more efficient and we now have the ability to embark on a statistical process control (SPC) methodology for monitoring our operations. ZYGO's solutions have helped us drive our mirror yields up to 99% with excellent correlation between our two sites."
Summary
Use of ZYGO's Mx™ metrology software has allowed Cambridge Technology to upgrade its interferometer capabilities, leading to considerable time savings. This has resulted in further cost savings through the removal of production and quality control bottlenecks, in turn leading to improved staff resource utilization and an overall increase in manufacturing efficiencies.

This information has been sourced, reviewed and adapted from materials provided by Zygo Corporation.
For more information on this source, please visit Zygo Corporation.