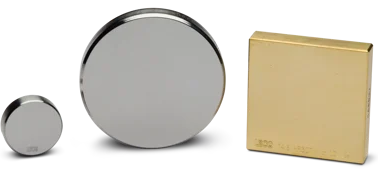
Hardness testing is a rapid approach for examining product quality or process results, with minimal sample preparation and uncomplicated tests that can be learned in just a few minutes.

Image Credit: LECO Corporation
To ensure the accuracy of hardness test outcomes, it is imperative to validate the precision of the hardness tester. Different hardness testing standards have varied frequencies for calibration checks, but all of them require an upfront calibration assessment.
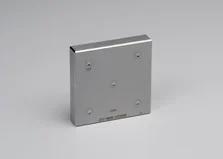
Verifying the calibration of a hardness tester is as straightforward as using a test block. The test block contains a certified hardness number corresponding to a specific force for a particular hardness test. However, understanding the defined levels can become confusing.
ASTM E18 provides detailed information on Rockwell hardness testing, and it is conveniently clear in its selection of testing blocks. The instrument must be validated daily using a test block within 15 Rockwell points of the specimen being tested.
For instance, if the sample is expected to register 40 on the Rockwell C scale, the test block should have a hardness between 25 and 55 on the same scale. If a suitable test block is unavailable, two blocks, one with higher hardness and the other with lower hardness, can be used to confirm the calibration.
Even though Rockwell testing is the most commonly employed method for hardness assessment, alternative methods such as Brinell, Knoop, or Vickers may also be applied. The guidelines related to these tests are not as straightforward when selecting test blocks.
Various standards, like ASTM E10 for Brinell and ASTM E384 and ASTM E92 for Knoop and Vickers, specifically recommend a test block with "approximately the same hardness value as the material to be measured," offering vague specificity.
While ASTM E384 does present a table with hardness ranges, these ranges exhibit numerous levels of variation.

Image Credit: LECO Corporation
When selecting an appropriate test block, it is important to remember that the goal is to verify the calibration of the instrument, not the material being tested.
Having a test block that precisely matches the sample is not as crucial as ensuring the instrument functions correctly within the tested range.
This is why LECO recommends maintaining a set of test blocks that cover the typical hardness range of the tested materials. If there are doubts about a test block being "approximately" close, it is advisable to test two blocks, one above and one below the sample, to confirm calibration across the entire range.
Starting with a reliable standard test block is vital for confidence in the results. This is why LECO provides diverse test blocks to meet all the laboratory requirements.
LECO can fulfill almost any request for hardness test blocks based on type, indenter, hardness, and load. LECO’s commitment to quality extends to all LECO-branded consumables, standards, and reference materials.

This information has been sourced, reviewed and adapted from materials provided by LECO Corporation.
For more information on this source, please visit LECO Corporation.