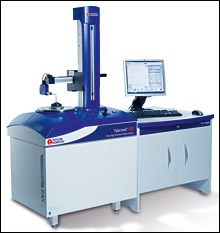
The New Talyrond 500 Series by Taylor Robson range enables measurement of three critical performance elements, Roundness, Surface finish, and now Contour, exactly as they were produced.
Reproducible measurement results
Decades of experience, ultra precision machining expertise and FEA optimized design combine to provide low noise and near flawless mechanical execution of the measuring axes. Further enhancement via the use of traceable standards and exclusive algorithms effectively eliminates instrument influence from the measurement results. 
High precision emulation of your manufacturing process
The all-new Talyrond 500 roundness instruments use rotary, vertical and horizontal measuring datums to duplicate your machine tool's movement and exactly reproduce the workpiece shape. This ultra high precision simulation of the cutting tool path enables precise control of your manufacturing process.
Multi-disciplined measurement
Understanding the manufacturing process means understanding the measurement process
Made on axis, measured on axis
Made on axis, measured on axis
Machine tool spindles constrain the work piece or tool movement to rotate about a fixed axis, while the tool path is controlled by slide ways set parallel or square to this axis. This allows the manufacture of profiled parts that are cylindrical or round in nature and have a functional axis. By the same philosophy, the Talyrond 500 range of instruments can measure profiled parts that are cylindrical or round by tracing a stylus along the same rotational axis, allowing reproduction and subsequent adjustment to the machine tool path, thereby controlling the process and improving product quality.