Sponsored by QATMApr 22 2020
Heat treatment is an essential technique for influencing workpiece characteristics. Several industries focus on reliable part design to avoid breaking parts, e.g. by decreasing material weight and workpiece size while maintaining high wear resistance on the outside of the material and tenacity in its core.
Various heat treatment shops are specialized in ‘surface hardening’ or ‘case hardening’ processes. Pieces are carburized, hardened and finally tempered with case hardening work. A hard and wear-resistant surface is created while the core remains relatively soft with a smooth passage between the two areas.
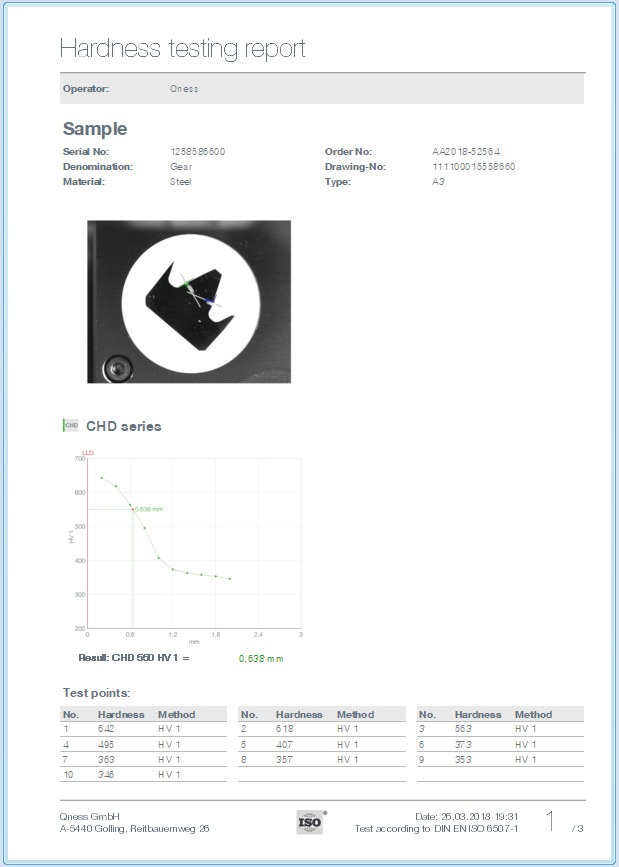
Case hardening is typically employed for gears of gearboxes. The “CHD” value is evaluated for hardness testing of case-hardened parts by setting multiple hardness test points throughout the cross-section of the hardened part.
The CHD value determines the hardening depth in millimeters from the surface where the hardness changes from hard to soft. Standards such as ISO 2639 define the requirements of the CHD test (Vickers test method, test point distances, etc.). The CHD limit hardness value is defined as fixed hardness, typically at 550 HV.
The chemical composition of the surface layer is not changed with surface hardening, in contrast to the case hardening. The aim is to achieve a fully martensitic structure at the surface region, typically after induction or laser hardening, while the core of the material stays unaffected by any hardening influence.
Surface hardening is often utilized for shafts such as camshafts or crankshafts. SHD hardness testing sees the limit hardness as a flexible value: the limit hardness is determined as the percentage value from the surface hardness of the part.
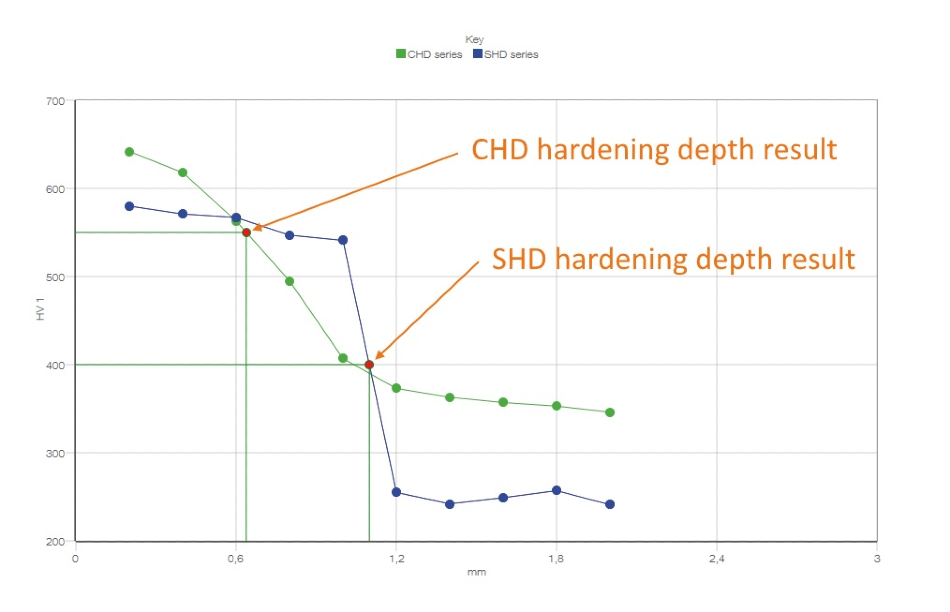
Figure 1. Difference between CHD and SHD hardened workpieces. 10 test points in the cross-section of the hardened zone; 0,2 mm test point distance each: the case-hardened part hardness curve is steadily decreasing while the hardness difference of the surface-hardened part changes rapidly. In both test procedures, the shape of the curve and the general depth of the evaluated result value indicate the hardening process quality.
Requirements for Hardness Testers in Heat Treatment Shops
The required hardness tests should be performed quickly and ideally close to the hardening process, even though the hardening process is quite complex and involves large furnaces and hardening machines. These are the most crucial requirements for hardness testers in the heat treatment process:
- Covering many varieties of workpieces
- Automation
- Import of process sheets and workpiece data
- Reducing the operator influence
- Simple operation
- Time-saving work with program templates
- Machine availability
- Automated data export and result assessment
- Integration into production systems (Order management systems)
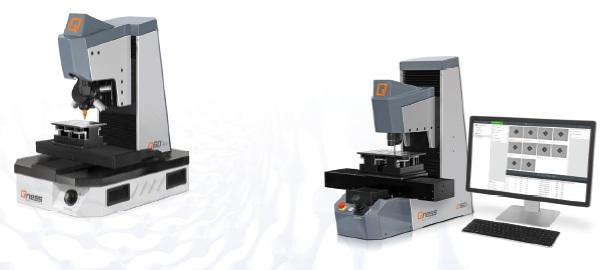
Figure 2. QNESS Q10/30/60 and Q150 A and A+ hardness testers.
Work Pieces
The workpieces are key to the hardening process. Most of the hardening shops are suppliers for other companies, so they have to be capable of manufacturing a huge range of parts and the hardness tester must cover the same range.
Versatile hardness testers should be able to fix mounted as well as unmounted samples, both small and large ones. The user should have the possibility to utilize vices, prisms, and magazines. Large testing areas on the hardness testers are required as well as smart clamping solutions.
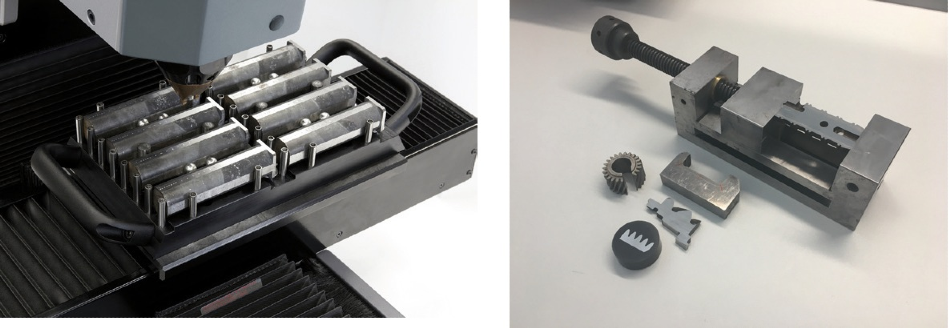
Figure 3. Magazine as clamping solution for same-parts-testing (left) Variations of different heat-treated parts, embedded and non-embedded (right).
Hardness Testing Process
In general, hardness testing software should be simple to use but it should also supply a large scope of functionalities. The program templates for the daily operation should be easily accessible and the operating surface should be clearly structured. Visualized features facilitate work with the hardness tester.
The program generation and management is typically performed by one or two advanced operators, but the production workers simply choose the correct program template and press start. Thanks to smart software operation design, operation errors can be minimized.
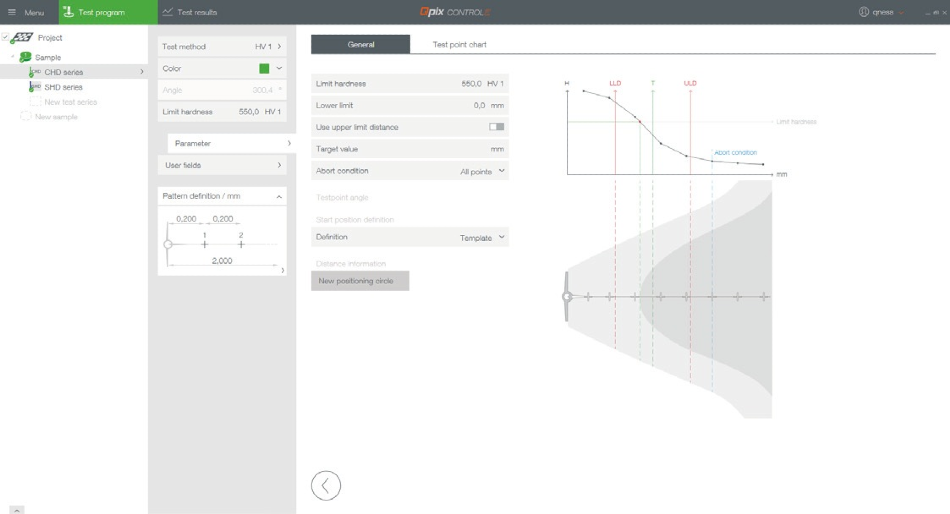
Figure 4. Hardness testing software: setup screen with a visualized graphical representation of the setting possibilities.
Hardness testing programs can contain hundreds of test point locations. The tests can be performed automatically by the hardness tester once they are applied, without any assistance. While the machine is working, the operator can use the time to prepare the next set of samples for hardness testing.
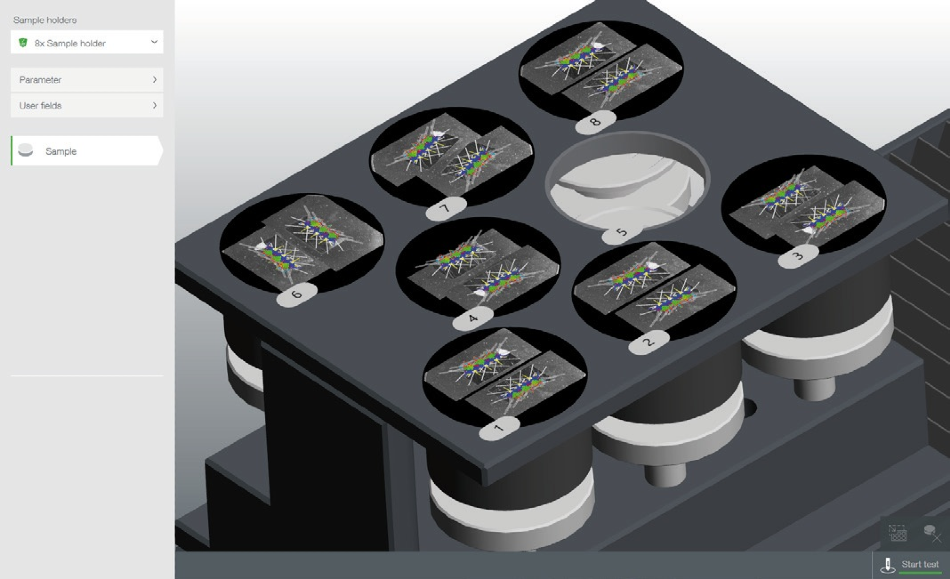
Figure 5. Preview of the hardness testing program in the hardness testing software: each colorized overlay graphic represents a CHD or SHD test point series. In the example, the machine would need 3 hours to work off approx. 400 test points.
Results
Users need either data export to databases or test protocols. Typically, the reports are linked into some data management system or they are directly stored on a network drive. Automated data export after the termination of the test sequences minimizes the work and time effort of the operator.
Conclusion
For hardening shops to assess the quality of case-hardened or induction-hardened parts, hardness testing is indispensable. Thanks to the unique Qpix Control2 hardness testing software and its 3D and visualization features, QNESS hardness testers make this a simple task.
The QNESS Q150A and A+ series comprises compact, high-quality, and fully automatic hardness testers suitable even for utilization in rough production surroundings for Brinell, Vickers, or Rockwell. The versatile micro hardness testers Q10/30/60 A and A+ provide automated hardness testing, also for low force ranges, for employment in a laboratory.

This information has been sourced, reviewed and adapted from materials provided by QATM GmbH.
For more information on this source, please visit QATM GmbH.