Sponsored by QATMApr 22 2020
Technical ceramics are utilized in a variety of products and also for coatings of components that have to be highly wear- or temperature-resistant. They are also used in non-conductive or non-corrosive materials in industries such as medical engineering, electronics or automotive.
Other than characteristics such as limited thermal dilatation or low density, ceramic materials also exhibit low fracture toughness but high hardness and high elastic modulus. Due to these mechanical qualities, ceramics are employed, for instance, in isolators, bearings, capacitors, cutting nozzles or blades, pumps or powder-coated metal surfaces.
Hardness testing is especially crucial to prove the mechanical strength of ceramic workpieces which are profoundly affected by wear. Some examples include brake disks, friction bearings, or turbine blades.
The Vickers procedure, usually with low-load test forces, is probably the most common hardness testing technique for ceramics. Knoop can also be applied in hardness tests on ceramic-coated layers because of its minor crack formation and little indentation depth.
Preparation of Ceramic Specimens for Hardness Testing
Optically evaluated test techniques such as Vickers or Knoop are always extremely sensitive to surface preparation quality. Ceramic surfaces do not have a regular structure in most cases.
The surface finish quality is hugely influenced by the geometrical deviation of the material and the crystal size. A finish with lapping or fine polishing is recommended to acquire a surface quality suitable for hardness tests, to ensure the hardness test indents are clearly visible in the ceramic material.
The surface of the material or graphic specimen may appear very dark or even black, depending on the raw material of a ceramic which makes measurements under a microscope lens challenging.

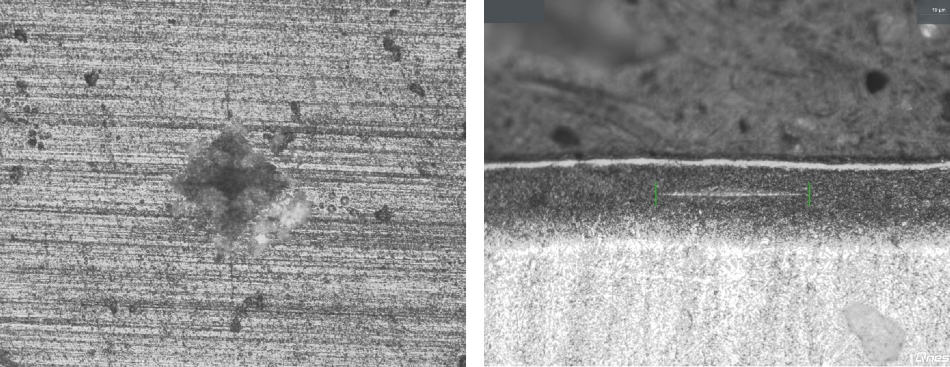
Figure 1. Left: Vickers indent surface of full-ceramic part 10x microscope lens Right: Knoop indent cross-section ceramic layer 40x microscope lens.
Hardness Testing Procedure and Test Methods
Knoop and Vickers are the only standard hardness testing procedures which are also suitable for hard materials >1000 HV-like ceramics. Ceramics may reach a hardness close to 2000 HV, depending on the material composition.
Challenges
- Visibility of indents due to low test forces (0,3 – 5 kg) and high magnification
- Visibility of indents due to dark surface
- Visibility of indents due to the high hardness values
- For cross-sections: to position the hardness testing indent exactly in the center of the layer
The lower the surface finish quality and the lower the test force, the higher the chance that the indent diagonals must be measured manually. Optic evaluation systems delivering good contrasts will heighten the level of automation enormously.
Benefits of the Knoop procedure
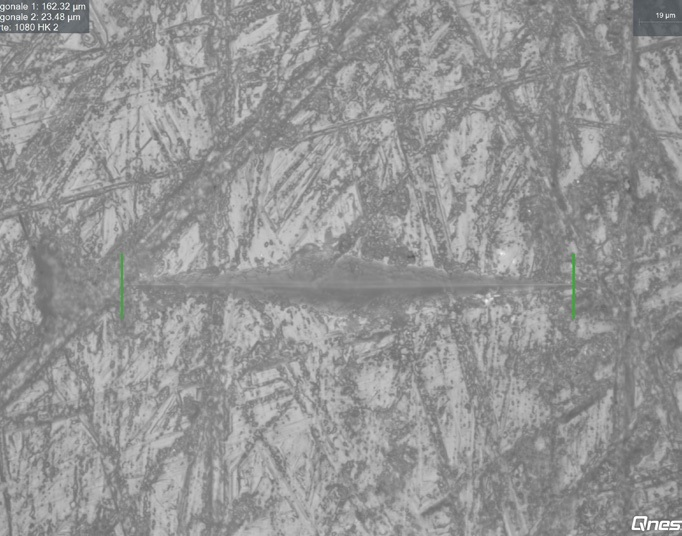
With a similar load step, the indent is smaller and shallower than a Vickers indent but it is still quite easy to measure the length of the two different Knoop diagonals.

Figure 2. Knoop indent Surface hardness indent 40x microscope lens.
Conclusion
The advanced optic system quality of QNESS Q10/30/60 and Q150 hardness testers facilitates routine hardness testing on ceramic material samples or even working with parts with ceramic coatings.
Depending on the surface finish and magnification, automatic image evaluation is possible even in complicated testing situations, for example when carrying out hardness tests on complex materials.
Either the simple semiautomatic Q10/30/60 “M” models or the professional fully automated Q10/30/60 or 150 “A” or “A+” series are the perfect choices for ceramic material testing applications, depending on the number of tested samples. Reporting tool and export functions permit the creation of test protocols or data export to data management systems.
QNESS Solutions for Ceramic Materials
Q10/30/60 Series
- 6-position measurement turret
- Test forces between 0.25 g and 62.5 kg (Vickers, Knoop, Brinell)
- Exact positioning
Q150 Series - Models Q150A or A+ in Production Monitoring
- An advanced optic system providing outstanding image quality
- Test forces between 1 kg and 250 kg (Vickers, Knoop, Rockwell, Brinell)
- Ultra-robust, very compact

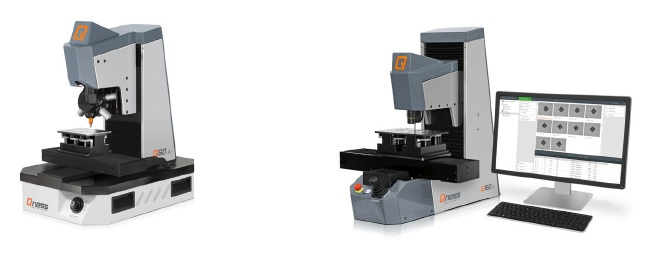
Figure 3. QNESS Q10/30/60 (left) and Q150 A and A+ (right) hardness testers.

This information has been sourced, reviewed and adapted from materials provided by QATM GmbH.
For more information on this source, please visit QATM GmbH.