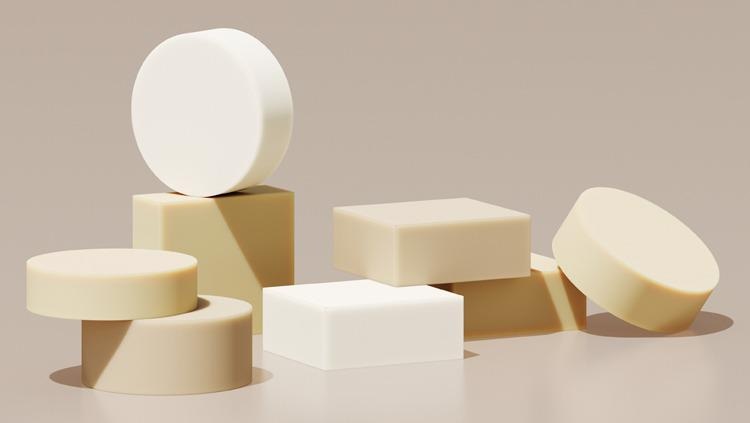
Image Credit: Stable Micro Systems Ltd
Over the centuries, it has been established that bricks, tiles, porcelain, pottery, glass, cement, and concrete are widely considered to be materials that are both useful and have a variety of functions.
While tiles have been fixed on walls, floors, and roofs (inside and out), glass is utilized for applications such as windows and smartphone screens.
Recently, advanced ceramics have been engineered for very specific applications.
Silicon nitrides and tungsten carbides have been developed for making extraordinarily hard, high-performance cutting tools; silicon dioxide and alumina used in the manufacturing process of microchips; and lithium-silicon oxide is used to produce the heat-protective nose cones of space rockets.
These state-of-the-art ceramic materials can be basic compounds or composite materials depending upon the desired properties of the end-product and their usual/unusual purpose.
Whether they are visible when utilized in aerospace for exceptional and unusual applications, or in the construction industry for basic building materials and cutting tools, they are also hidden inside electrical and electronic materials where they are selected for different property reasons.
Among the assorted properties including heat-resistance, scratch-resistance, insulation, hardness, durability, strength, and superconductivity in advanced industrial ceramics, there is also the demand for ceramics in the world of medicine.
Ceramic materials are used in applications ranging from the piezoelectric transducers that generate ultrasonic waves used in pregnancy scans to the hard dentures made from porcelain, as well as bone implants that are intelligently designed to be porous so they stimulate natural bone growth.
These are all exceptional uses for an established field of materials. What’s more, is that these materials are now available to the world of 3D printing!
Whilst the progress and development of new ceramic materials are meeting the growing demand in industrial and laboratory settings there is the continued necessity to always measure and quantify physical properties.
This includes both the raw materials and finished products in order to establish that mechanical integrity meets the appropriate requirements and expectations.
This is where a Texture Analyzer/Materials Tester can be employed with its ability to compress, bend, extrude, stretch, puncture, cut, or snap a product and offer an objective analysis of the material’s physical capacity, e.g. tensile strength, fracturability, flexural modulus, compressibility, to name just a few properties.
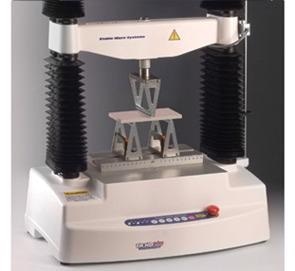
TA.HDplus Texture Analyzer for the measurement of physical properties. Image Credit: Stable Micro Systems Ltd
This article provides a carefully chosen set of examples of recurrent ceramic product measurements and, where feasible, a publication of where the texture analysis instruments have been found in action.
Properties that can be Measured
Strength of Green Compacts
To manufacture structural parts from ceramics while utilizing a sintering process from powdered form, the powders must first be compressed into compacts at room temperature prior to being baked in a furnace.
The green compact that comes from this is not useful until it is sintered, but it must have the strength necessary for manipulation methods such as machining and handling before sintering.
This can be influenced by several factors such as powder properties, compacting pressure, geometry, and visible powder density.
The compact’s strength can be measured using a compressive test, having precisely measured its dimensions, or utilizing a Brinell hardness measurement in a flat sample surface.
Don McGlinchey’s book, Bulk Solids Handling: Equipment Selection and Operation, details the use of the Stable Micro Systems for such purposes.
Properties of Powders Used in Green Compacts and 3D Printing
When a ceramic powder is integrated into the powder manufacture of solid parts, the development of caking or clumping can lead to defects. In addition, when the powder is handled on an industrial level, a sample susceptible to caking can cause ratholes and costly delays in the factory.
The propensity of a powder to clump can be quantitatively measured by utilizing numerous measurements on a Texture Analyzer. Static measurements include Unconfined Yield Stress and Powder Vertical Shear Strength, whereas the Powder Flow Analyzer, offers a frequently used dynamic measurement.
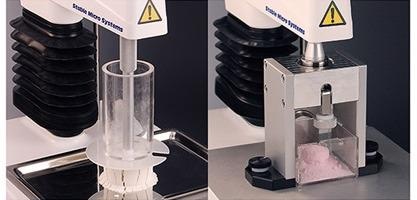
Unconfined Yield Stress Rig and Vertical Shear Strength Rig. Image Credit: Stable Micro Systems Ltd
The bulk density of the powder can affect the green compact strength. This can also be observed using the Powder Flow Analyzer which utilizes a conditioning sequence to make sure powders have uniform preparation standards prior to measurement and a split vessel to consistently cut the powder volume.
This measurement can be integrated automatically with the measurement of powder caking, cohesion, or speed flow dependency.
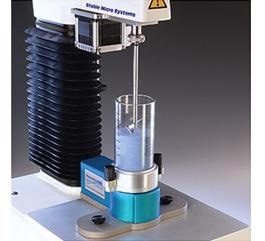
Powder Flow Analyzer. Image Credit: Stable Micro Systems Ltd
The manufacturer must know how a powder will respond to applied stress, including its relaxation behavior. This can be observed and recorded using the Indexable Powder Compaction Rig, or for more sophisticated analysis, the High Tolerance Powder Compaction Rig.
The ALIS (Automated Linear Indexing System) can be used where automated relaxation tests are concerned. These powder properties are also applicable to powders applied in 3D printed parts, an industry that is rapidly expanding in the ceramics field.
For a common example of this in the powder metallurgy industry click here.
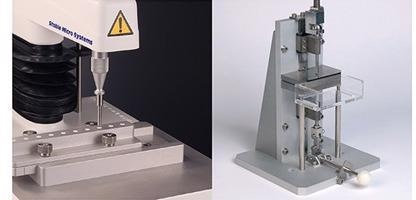
Indexable Powder Compaction Rig and High Tolerance Powder Compaction Rig. Image Credit: Stable Micro Systems Ltd
Strength of Ceramic-Metal, Ceramic-Resin, or Ceramic-Ceramic Bonds
The measurement of bond strength is also of significant interest to the dental industry, where the strength of veneers, fillings, and implants is critical to the application of these components.
These bonds are typically tested in shear, although some publications have called for a tensile or flexure test. Regardless of which, all are possible with a Texture Analyzer.
You can observe a classic example in the dentistry industry here.
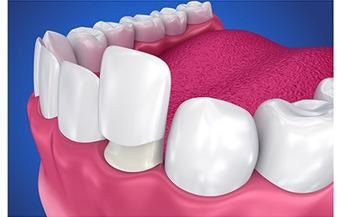
Image Credit: Stable Micro Systems Ltd
Strength of Joint Replacements
When a ceramic joint prosthesis is fabricated for use in the body, it is vital to have full in-depth knowledge of its chemical and physical properties. This includes strength and fatigue testing of the entire component, or specific parts of the component under the duress of a set loading configuration.
A range of strength and fatigue tests are feasible utilizing the TA.HDplus Texture Analyzer, with a loading range of 0.5-750 kgf.
A typical example in the medical industry can be seen here.
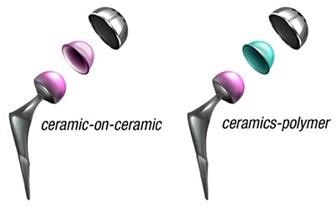
Image Credit: Stable Micro Systems Ltd
Cyclical Fatigue of Ceramics
Cyclical fatigue, a property usually associated with metal structures, can be a complication that affects ceramic materials too.
Where a high-performance ceramic is employed as a structural component (such as at high temperatures in engines), a full understanding of the effect of cyclic loading on fatigue failure is vital, due to varying stresses and strains.
This is also a major effect on ceramics utilized in environments that are considered less extreme, such as ceramic crowns in the mouth or as stacked capacitors, as they routinely experience cyclic loading. Cyclical fatigue can be measured in tension, compression, or flexure.
See a standard example in the dental industry here.
See a standard example in the electronics industry here.
General Compressive Testing
See a standard example in the dental industry here.
See a standard example in the bioceramics industry here.
See a standard example in the medical industry (diametral compression) here.
See a standard example in the electronics industry here.
Patent: see how Ibidem Co. Ltd. measured breaking strength of the honeycomb structure filter fired body using a Texture Analyzer here.
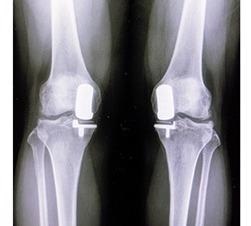
Image Credit: Stable Micro Systems Ltd
General Tensile or Adhesive Peel Testing
See a standard example in the electronics industry here.
See another standard example in the electronics industry here.
General Flexure Testing
See a standard example in the dental industry here.
Puncture Testing
Patent: See how LG Chem Ltd measured the perforation force of ceramic filter papers using a Texture Analyzer, i.e., puncture testing here.
Measuring Density Using a Ceramscan
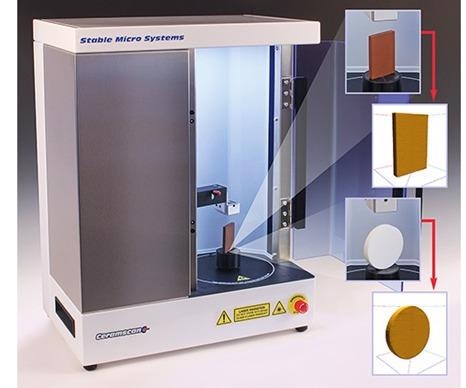
Ceramscan showing the location of samples for testing and resulting sample scans. Image Credit: Stable Micro Systems Ltd
Considering the potential inaccuracies of displacement methods in establishing porosity in ceramics, manufacturers are motivated in seeking out other options.
Laser profiling has been developed as a pioneering non-contact, non-destructive method of measuring density, which is well-suited to fragile samples, such as green compact ceramics.
Laser scanning equipment removes many of the restrictions and inaccuracies of conventional density measurement techniques. Stable Micro Systems’ Ceramscan instrument functions by loading a sample onto one of a number of platform options.
One of which is a disposable plate to which the sample can be affixed to support it on its perimeter. The settings that are desired can be easily entered into the software prior to performing the test.
Measurements are produced automatically after each scan, including surface area, volume, and density. Comparison of samples in the same batch is also easier as the mean, standard deviation, and coefficient of variation are calculated automatically.
Throughout the test, the product is weighed on an external balance and recorded to three decimal places. The laser device, which has been declared safe for eyes, is vertically scanned to calculate the contours of the product at eligible intervals while it rotates. Each interval acquires 400 data points, to produce a comprehensive profile.
Density scans can be rapidly performed by utilizing this method; ranging from just a few seconds to several minutes contingent on the interval selected (0.05 mm to 50 mm) and the desired degree of precision.
Manufacturers are able to test samples up to 300 mm in height and 190 mm in diameter, with a weight of up to 10 kg (utilizing the loadcell located in the instrument), making it also appropriate for tiles, tableware, and many more.
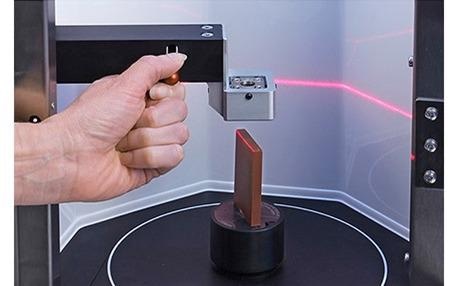
A laser scans the sample whilst it rotates to produce a 3D scan. Image Credit: Stable Micro Systems Ltd
Measuring Product Dimensions
If a product has been designed in a CAD package and subsequently printed, one consideration will be whether what has been printed is what was designed.
In most cases, the printed object needs to be dimensionally accurate and repetitions of printing a design are inevitable to modify the printing settings to produce a product that is precise and dimensionally accurate.
Thereby, accurate digital assessment of physical dimensions becomes an essential part of the process. A Ceramscan offers such a solution due to high-speed 3-dimensional digitization of products that allows for automatic calculation of numerous detailed dimension related parameters.
The results of which may be mathematically manipulated for instant use or future retrieval across a wide range of data formats for printed objects.
Testing equipment has been advanced to offer even more measurement opportunities and improvements to conventional problems.
Whether the requirement is for conventional measurements, fundamental physical property parameters, or newly available empirical parameters used in innovative fields, Stable Micro Systems can provide a wide range of measurement parameters via the Ceramscan and Texture Analyzer range.

This information has been sourced, reviewed and adapted from materials provided by Stable Micro Systems Ltd.
For more information on this source, please visit Stable Micro Systems Ltd.