Case hardening is a procedure that is generally used for hardening cast irons, steels and other ferrous materials in such a way that the surface layer is significantly harder than the rest of the material (i.e., than the ‘core’ material). Certain treatments are performed under this procedure and they include Induction Hardening, Carburizing, Carbonitriding, or Nitriding. These procedures tend to affect the mechanical properties and surface chemical composition.
Total Case Depth
At least two different ways are available wherein the depth of the case can be defined. Total Case Depth refers to the perpendicular distance from the hardened case’s surface to the point at which variations in physical and chemical properties between the core and the case can be differentiated. With the help of a microhardness tester or by means of metallographic procedures (i.e., mount, grind, polish and etch), the Total Case Depth can be established.
Effective Case Depth
However, majority of laboratories need to calculate the ‘Effective Case Depth’ of a material. This is the perpendicular distance from the hardened case’s surface to the deepest point at which a particular level of hardness is maintained. A number of hardness criteria exist; Rockwell "C" 50 (Vickers 513) is one such option. In order to establish the ‘Effective Case Depth’, a cross-section of the sample is normally microhardness-tested at accurate intervals beginning from close to the surface and continuing toward the core. The distance from the surface where hardness reduces to the specified value as shown in the chart below, is considered to be the Effective Case Depth.
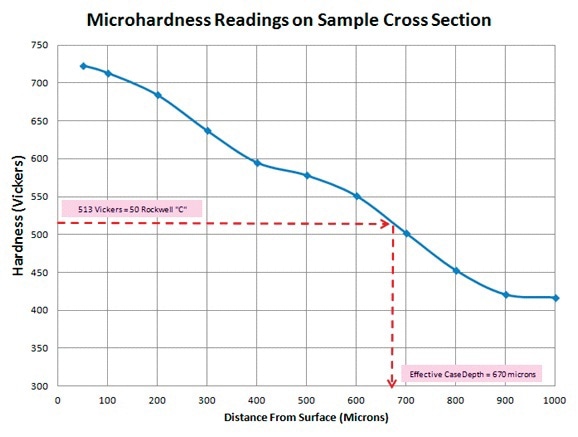
Microhardness readings on sample cross section.
Conclusion
The small Vickers impressions need measurement at high magnification, which is approximately 500X. In order to make precise measurements, the sample must be given a finish that is free of scratches, which can prove difficult when automatic hardness testing needs to be performed. A precise metallographic process may comprise the use of three or more grinding steps utilizing Silicon Carbide abrasive discs, then followed by one or two polishing steps.
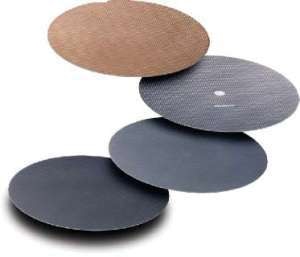
With the help of LECO’s CAMEO discs, this process can be brought down to three steps (i.e., grinding, pre-polishing and final polishing).
Sample for Case Depth Analysis (GPX200 — 1.25" Mounts)
| Disc |
Abrasive/Fluid |
Time (mm:ss) |
Head Dir. |
Lbs. Head Press. |
RPM Head Speed |
Wheel Dir. |
RPM Wheel Speed |
| Platinum 1 |
Water |
2:00 |
CW |
35 |
75 |
CCW |
175 |
| Silver Disc |
6μ/ME |
2:00 |
CW |
35 |
75 |
CCW |
175 |
| Ultra Silk |
3μ/ME |
3:00 |
CW |
45 |
100 |
CCW |
200 |
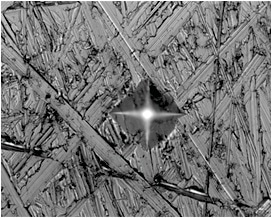
After Platinum 1 Grinding Step: There are a large number of scratches on the surface. The Vickers hardness impression has a couple of edges that could have been influenced by the scratches and the impression corners are not distinct.
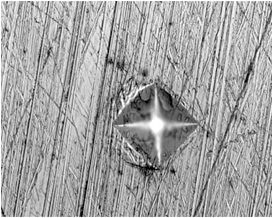
After Silver Disc (Pre-Polishing) Step: Still a large number of scratches can be seen on the surface. The Vickers hardness impression corners are not distinct.
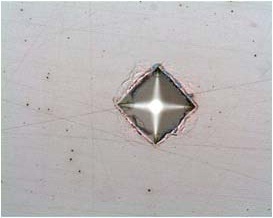
After UltraSilk (Polishing) Step: There are only a few minor scratches on the surface. The Vickers hardness impression corners are distinct, and a precise measurement of the diagonals is possible.
The above process uses the CAMEO Magnetic Disc System combined with the LECO GPX 200 Grinder/Polisher with fixed sample holder.

This information has been sourced, reviewed and adapted from materials provided by LECO Corporation.
For more information on this source, please visit LECO Corporation.