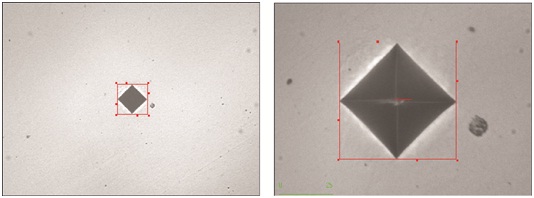
The HMV-G series of Micro Hardness Testers offered by Shimadzu indents a material and subsequently measures the size of the resulting indentation for determining hardness. The HMV-G series includes a range of systems, from standalone models to fully automated versions.
Standalone versions feature manual stage movement and indentation reading by means of an optical microscope. Fully automated versions have programmable movement and provide automatic reading by analyzing images captured by an integrated CCD camera.
HMV-G Models
The following models are available in the HMV-G series:
- HMV-G20 series standalone testers with manual stage movement and manual indentation reading
- HMV-G21 series with manual stage movement and automatic indentation reading
- HMV-G-XY series testers with motorized XY stage movement and automatic indentation reading
- HMV-G-FA series with motorized XYZ stage movement and automatic indentation reading
All HMV-G models come with nine preset forces ranging from 98.1mN to 19.6N, and four additional programmable force settings. They also feature a 40x objective lens to measure indentation size. The HMV-G20 series can perform quick testing with its simple test mode, which only requires the setting of test force and indentation duration time. It features a user-friendly LCD touch panel to display test condition settings and plot statistical graphs and direct USB transfers to automatically save data onto a USB memory stick in CSV format.
The HMV-G21 series is versatile and provides automatic and highly reproducible indentation readings within a second using its integrated CCD camera. The compact tester also features easy to use software, and routine inspection graphs to monitor hardness changes over production cycles.
The HMV-G-FA series has all the features of the HMV-G21 series but also includes automatic indentation and measurement of test patterns, mapping the entire image of a sample for quick movement to indentation sites. It also has a specimen edge recognition function to set up edge or area testing, preloaded, customizable test patterns, and programmable depth of hardening measurement in accordance with ISO 3754 and JIS G0559.
Key Features
The key features of the HMV-G series are as follows:
- It supports Vickers, Knoop, Brinell, and triangular pyramid indentation tests. A Vickers indenter comes as standard and Knoop, Brinell, or 115° triangular pyramid indenter can be integrated as an option.
- G-shaped design increases workspace, improves operability, allows uniform dispersion of test loads. Since the back of the G-shaped frame is open, long and narrow samples can be tested. Additional Options
- It is possible to mount two indenters and up to four objective lenses on the same turret
- Low test force option with three additional forces of 9.81mN, 19.6mN, and 49.0mN
- Motorized turret rotation to switch between indenter and lens (included as standard on the HMV-G-XY and HMV-G-FA series)
Software
The test software, applicable to the HMV-G21, HMV-G-FA and HMV-G-XY Series of micro hardness testers, utilizes a sequence of intuitive operations from setting test conditions through to showing results. Sophisticated functions include mapping a view of a whole sample for simple and easy stage movement, and a visualization of where an indentation pattern will be produced on a sample.
Easy and Reliable Measurement of Samples of Unknown Hardness
An automatic lens switching function integrated in certain models switches the lens to suit the indentation’s size. In the event the diagonal line length of the indentation is below 1/4 of the field of view of the image, the instrument will automatically switch to the optimal high-magnification lens to facilitate indentation measurement. This means, even novice users can easily and consistently determine samples of unknown hardness.

Sample Shape Recognition Function
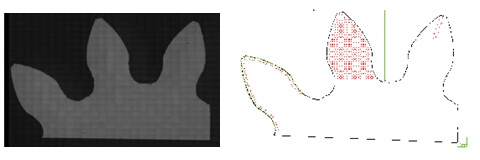
The shape of the sample is automatically recognized, and the pattern can be used to set up the shape information. Therefore, test position setting can be automated that previously required the full attention of analysts. In addition, all operations such as testing, data processing, hardness distribution mapping, etc. can be automated. This prevents errors in data input and thus improves operating efficiency.
