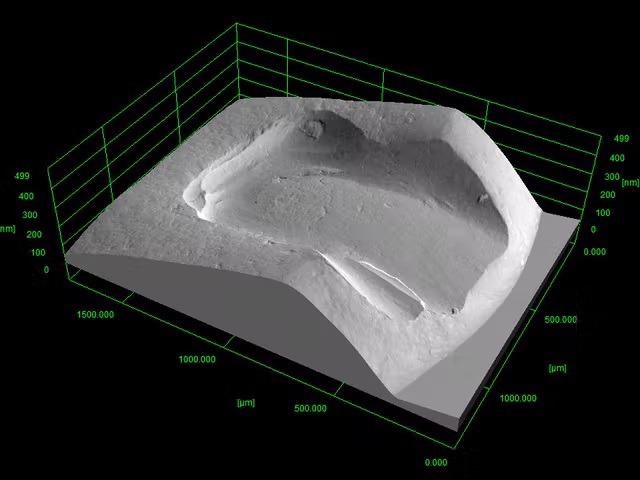
Conventional scanning electron microscopes tend to measure and examine all types of samples in two dimensions (2D). To examine the sample surfaces in three dimensions (3D), users need the 3DSM, ZEISS’ optional software package.
Users can obtain topographical information by rebuilding a full 3D model of the sample’s surface with the help of the signals of backscatter detectors.
Usual use cases include profile height measurements. They are typically carried out by an AFM or a profilometer in a quality lab or industry research, e.g., for the quick evaluation of imprint processes or machined surfaces.
Both methods are deficient in the simple localization of the ROIs that an SEM provides. Upon request, the measurement accuracy can be modified to suit the user’s instrument precisely using a calibration standard with clear step heights.

Image Credit: Carl Zeiss Microscopy GmbH

Image Credit: Carl Zeiss Microscopy GmbH

Image Credit: Carl Zeiss Microscopy GmbH
Highlights
3DSM
- Users can carry out a 3D surface reconstruction of ideal samples inspected with electron microscopes fitted with an AsB (Angular selective Backscatter) or an aBSD (annular Backscatter, GeminiSEM Family only) detector.
- Instantaneous operation and reconstruction times of less than 2 seconds with GeminiSEM; Sigma provides the images in a sequence.
- 3DSM can be combined with SmartSEM, the software that works the SEM, for sequential or real-time 3D imaging or work in stand-alone mode to view archived project files.
- Users can carry out regular measurements like profile dimensions, and 2D- and 3D roughness evaluations straightaway on the ensuing 3D model – with only a few clicks of the mouse.
- The fundamental “shape-from-shading” algorithm manages the reconstruction.
- Gain from new normal roughness values (Sa, Ra,) and new filters for noise correction and waviness.
- 3DSM currently is offered with a new GUI, arranged to match the workflow steps: position, acquire and correct.
3DSM Metrology
- Users can upgrade their ZEISS FE-SEM with the optional package 3DSM Metrology to profit automatic documentation and measurements in keeping with ISO 25178, ASME, DIN and other regulations for routine checks.
- Surfaces can be examined in 3D and complete measurement records can be generated.
- Surfaces and profiles, such as parameters like roughness, step height, nanometer scaled contour, distance, waviness, and grain and particle size can be characterized.
- Develop totally traceable metrological reports.

3D quantitative surface model. Image Credit: Carl Zeiss Microscopy GmbH